- Offer Profile
-
Advanced Laser Beam Delivery Solutions
Laser Mechanisms is the recognized world leader in the design and manufacture of laser beam delivery components and articulated arm systems.
Laser Mechanisms’ products are used in every type of industrial application including cutting, welding, drilling, scribing, surface treatment and other processes. The products are used with every type of laser, including CO2, Nd:YAG, Fiber Lasers and more.
New: Solution for additive manufacturing
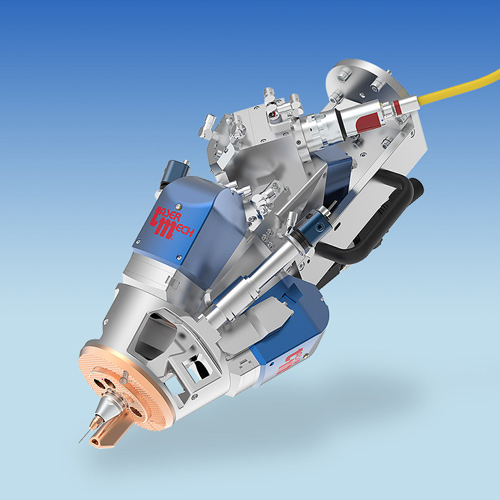
FiberWELD® DH
-
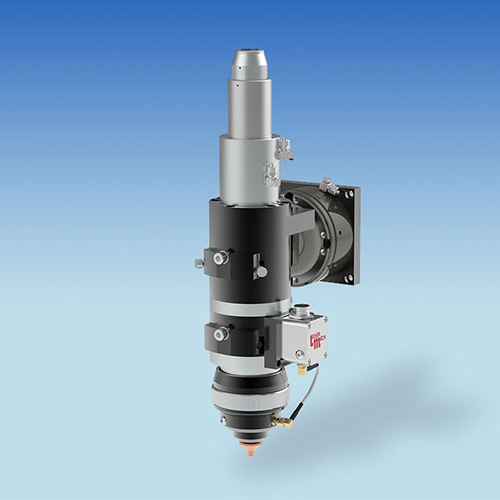
FiberWELD® DH is a robust head with direct-cooled reflective optics that minimize focus shift. It’s engineered for high duty cycle production applications with medium to high power, fiber-delivered lasers. The head’s advanced optical design permits wire to be fed directly into the beam path – right into the center of the melt pool. This allows the laser or cladding process to have total directional independence. Also, FiberWELD® DH’s easily accessible, protective cover glasses extend the life of internal optics.
Features:
- Robust, direct-cooled reflective optics minimize focus shift
- For all fiber-delivered laser systems (Diode, Fiber, Disc) up to 30 kW
- All optics are housed in sealed compartments to prevent contamination from process smoke and debris
- Temperature monitored optics
- Cover glass contamination monitoring/warning
- Quick and easy access to the cover slide (no tools required)
- Cross-flow air knife
- Omnidirectional processing
- Hot wire compliant
- Direct-cooled wire feed
- Direct-cooled, back-reflection protection
- Optional camera-based vision and process monitoring
Solutions for industrial laser beam delivery
FiberCUT® Series
FiberCUT® ST
-
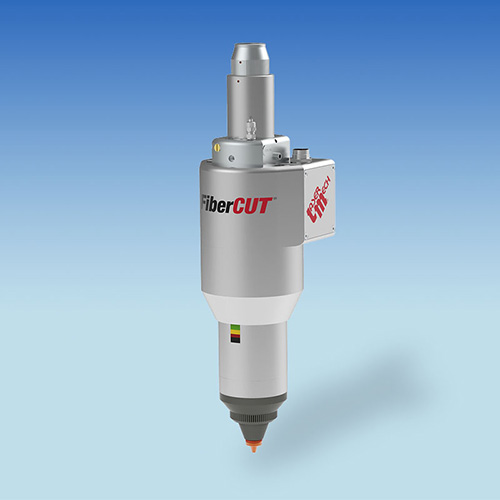
Laser Mechanisms’ FiberCUT® Straight (ST) laser processing head collimates and focuses a fiber-delivered laser beam and directs it along with cutting gas through its nozzle for optimal metal cutting. FiberCUT® ST’s nozzle also senses the required tip standoff from the workpiece and automatically maintains that distance through its internal z-axis drive system. The head’s cover glass protects the cutting lens from process debris.
- 3-dimensional cutting with fiber-coupled laser for 16 kg robots
- Low moving mass minimizes inertia transfer to robot support arm
- Internal, low-noise height sensing system is insensitive to cutting plasma or piercing debris
Features:
- Z lens focus-to-tip adjustment
- Works with all leading fiber-delivered laser systems up to 4 kW
- Complete system consists of cutting head, fiber collimator and linear drive with position measuring
- Cam-operated z-axis drive system with axial crash protection
- All wiring and assist gas lines are internally plumbed – avoiding costly snags and breaks
- Cartridge style drawer provides quick and easy access to the cover glass
- Provides error signals in case of collision, over-
temperature and exceeding the operating range - Sealed beam path
- Engineered for the harsh factory floor environment
Specifications:
CUTTING HEAD
- Power Rating: up to 4 kW
- Focusing Lens (Focal Length): 75 mm, 100 mm, 125 mm, 150 mm
- Focusing Lens (Diameter): 28 mm
- Clear Aperture: 25 mm
- Nozzle Tip (Various Shapes): 1.0 mm to 2.5 mm
- Assist Gas Pressure: up to 20 BAR
- Weight: 3.5 kg
- Height (Center Of Travel): 182 mm
- Slide Travel: ±15 mm
- Max. Travel Speed: 175 mm/sec.
- Standoff Distance Range (1 mm Recommended): 0.5 mm to 2.0 mm
COLLIMATOR
- Focal Lengths (Doublet, Fused Silica): 75 mm, 100 mm
- Recollimating Lens (Diameter) : 28 mm
- Clear Aperture: 25 mm
- Fiber Socket (Others Available On Request): QD (LLK-D, LCA), QBH (HLC-8), Q5 (LLK-B)
CONTROL BOX
- Sealed Enclosure: 380 mm L x 300 mm W x 160 mm H
- Single Interconnect Cable: up to 15 m long
- Number of Standoff Settings: 7
- Electrical Supply: 85-264 VAC, 1-Phase,47-63 Hz
- Interface Inputs: 5-24 VDC, 2.2 kΩ impedance, optically isolated
- Interface Outputs: 12-24 VDC, 150 mA max., sink/source, optically isolated

FiberCUT® STa
-
Laser Mechanisms’ FiberCUT® STa laser processing head collimates and focuses a fiber-delivered laser beam and directs it, along with cutting gas, through its nozzle for optimal metal cutting. The head features programmable focus position adjustment which delivers exacting cutting in materials with varying thickness and fastest possible piercing. FiberCUT® STa’s nozzle also senses the required tip standoff from the workpiece and automatically maintains that standoff through its internal drive system.
- 3-dimensional cutting with fiber-coupled laser for 16 kg robots
- Up to 30 mm of programmable focus-to-tip adjustment
- Low moving mass minimizes inertia transfer to robot support arm
Features:
- Complete system consists of cutting head, motorized fiber collimator and linear drive with position monitoring
- All wiring and assist gas lines are internally plumbed – avoiding costly snags and breaks
- Cam-operated drive system with axial crash protection
- Upper cover glass to protect fiber/collimator optics
- Cartridge style drawer provides quick and easy access to the lower cover glass
- Provides error signals in case of collision, over-temperature and exceeding the operating range
- Sealed beam path
- Multiple gas jet tip options to optimize cutting quality and speed
- X-Y beam-to-tip centering adjustment
- Works with all leading fiber-delivered laser systems up to 6 kW with wavelengths of 1030-1080 nm
- Multiple process monitoring capabilities
- Multiple water-cooling aperture specifications for varying (NA or BPP) lasers
- Optional fiber clamp
- Engineered for the harsh factory floor environment
- Internal, low-noise height sensing system is unaffected by cutting plasma or piercing debris
Specifications:
CUTTING HEAD
- Power Rating: up to 6 kW
Focusing Lens (Focal Length): 104mm, 130 mm, 150 mm
Focusing Lens (Diameter): 28 mm
Clear Aperture: 25 mm
Nozzle Tip: Various Shapes
Assist Gas Pressure: up to 20 BAR
Weight: 3.8 kg
Height (Center Of Travel): 182 mm
Slide Travel: ±15 mm
Max. Travel Speed: 175 mm/sec.
Standoff Distance Range (1 mm Recommended): 0.5 mm to 2.0 mm
COLLIMATOR
- Focal Lengths (Doublet, Fused Silica): 79 mm, 103 mm
Recollimating Lens (Diameter): 28 mm
Clear Aperture: 25 mm
Fiber Socket (Others Available On Request): QBH, LLK-B, QD
CONTROL BOX
- Sealed Enclosure: 380 mm L x 300 mm W x 160 mm H
Single Interconnect Cable: up to 15 m long
Number of Standoff Settings: 7
Electrical Supply: 85-264 VAC, 1-Phase,47-63 Hz
Interface Inputs: 5-24 VDC, 2.2 kΩ impedance, optically isolated
Interface Outputs: 12-24 VDC, 150 mA max., sink/source, optically isolated
FiberCUT® RAc
-
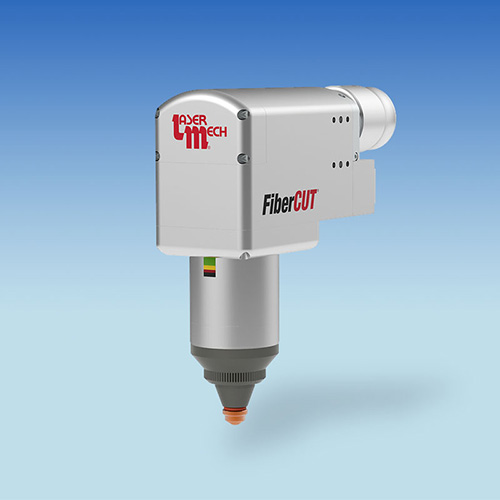
Laser Mechanisms’ FiberCUT® Right Angle, Compact (RAc) laser processing head collimates and focuses a fiber-delivered laser beam and directs it along with cutting gas through its nozzle for optimal metal cutting. FiberCUT® RAc’s nozzle also senses the required tip standoff from the workpiece and automatically maintains that distance through its internal z-axis drive system. The head’s cover glass protects the cutting lens from process debris.
- 3-dimensional cutting with fiber-coupled laser for 16 kg robots
- Low moving mass minimizes inertia transfer to robot support arm
- Right angle entry of all connections, including fiber, provides tight access to parts, easy cable routing and stress reduction on input fiber
- Nearly 30 percent smaller and lighter than the original FiberCUT® RA
Features:
- Internal, low-noise height sensing system is insensitive to cutting plasma or piercing debris
- Z lens focus-to-tip adjustment
- X-Y beam-to-tip centering adjustment
- Works with all leading fiber-delivered laser systems up to 4 kW
- Complete system consists of cutting head, fiber collimator and linear drive with position measuring
- Cam-operated z-axis drive system with axial crash protection
- All wiring and assist gas lines are internally plumbed – avoiding costly snags and breaks
- Cartridge style drawer provides quick and easy access to the cover glass
- Provides error signals in case of collision, over-
temperature and exceeding the operating range - Sealed beam path
- Engineered for the harsh factory floor environment
- Available with integrated slug detection – potentially eliminating the need for post-cutting detection equipment
- UltraSense™ model delivers accurate, capacitive height sensing for non-metal processing
Specifications:
CUTTING HEAD
- Power Rating: up to 4 kW
- Focusing Lens (Focal Length): 75 m, 100 mm, 125 mm, 150 mm
- Focusing Lens (Diameter): 28 mm
- Clear Aperture: 25 mm
- Nozzle Tip (Various Shapes): 1.0 mm to 2.5 mm
- Assist Gas Pressure: up to 20 BAR
- Gas & Water Ports: 6 mm tube to M5 fittings
- Weight: 3.2 kg
- Height (Center Of Travel): 242.4 mm
- Z-axis Travel: ±8.5 mm
- Max. Z-axis Speed: 175 mm/sec.
- Standoff Distance Range (1 mm Recommended): 0.3 mm to 4.0 mm
COLLIMATOR
- Focal Lengths (Doublet, Fused Silica): 75 mm, 100 mm
- Recollimating Lens (Diameter) : 28 mm
- Clear Aperture: 25 mm
- Fiber Socket (Others Available On Request): QD (LLK-D, LCA), QBH (HLC-8), Q5 (LLK-B)
CONTROL BOX
- Sealed Enclosure: 380 mm L x 300 mm W x 160 mm H
- Single Interconnect Cable: up to 15 m long
- Number of Standoff Settings: 7
- Electrical Supply: 85-264 VAC, 1-Phase,47-63 Hz
- Interface Inputs: 5-24 VDC, 2.2 kΩ impedance, optically isolated
- Interface Outputs: 12-24 VDC, 150 mA max., sink/source, optically isolated
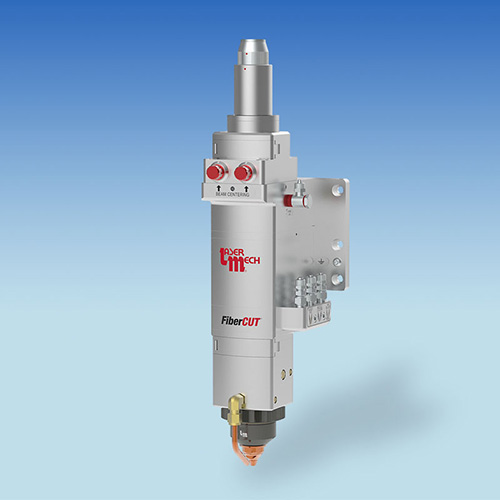
FiberCUT® 2D
-
Laser Mechanisms’ FiberCUT® 2D processing head delivers cutting-edge performance for flatbed systems up to 6 kW. Featuring automatic, programmable focus with 25 mm of travel, FiberCUT® 2D is a fully-sealed, purged design that minimizes the chance of internal contamination. FiberCUT® 2D goes even further with two cover glasses; one below the focus lens, and a second below the fiber to protect collimator optics. In addition, sealed access doors prevent contamination when cover glasses are serviced.
Features:
- Internal process monitoring to detect pierce through and loss of cut
- Internal sensors to determine the condition of all optics
- Standard nozzle cooling and air blast
- No exposed wires to snag or break
- Lightweight at less than 7 kg
- Laser Mech®’s patented height sense technology
Specifications:
CUTTING HEAD
- Power Rating: up to 6 kW
- Focusing Lens (Focal Length): 125 mm, 150 mm, 200 mm, 250 mm
- Clear Aperture: 35 mm
- Nozzle Orifices: 0.5 mm to 4 mm
- Nozzle Styles: Single Orifice, Double, Multi-Hole Shower, Custom
- Assist Gas Pressure: up to 20 BAR
- Focal Point To Nozzle Adjustment: -14 mm to +11 mm
- Weight: ~6.6 kg
LASER MECH® COLLIMATOR
- Focal Lengths: 60 mm, 100 mm, 120 mm
- Clear Aperture: 35 mm
- Fiber Connections (Others Available On Request): QD (LLK-D, LCA), QBH (HLC-8), Q5 (LLK-B)
HEIGHT SENSOR
- Standoff Distance Range (1 mm Recommended): 0.2 mm to 8.0 mm
- Calibration: Auto Calibrating
- Response Time: Temperature Stability: ±5% of Standoff Setting, 0° to 45° C
- Power Requirement: 24 V
- Output (Optimized Curve For Flat Metal or Linear Signal): 0-10 V Analog
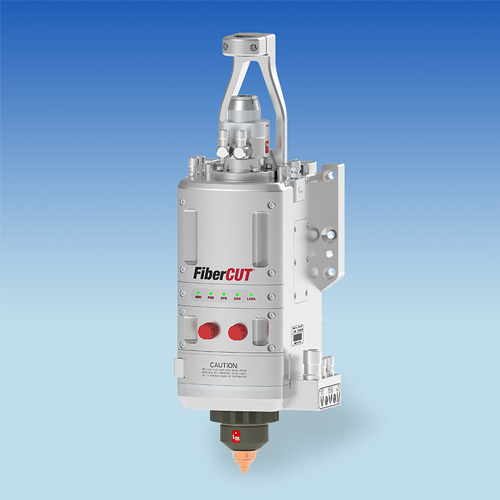
FiberCUT® 2Dx
-
Laser Mechanisms’ NEW FiberCUT® 2Dx processing head delivers the industry’s largest diameter optics and clear aperture – accepting high-power lasers with up to 0.18 numerical aperture (NA). Featuring Laser Mech’s new autofocus system, FiberCUT® 2Dx is 3-5 times faster than the original FiberCUT® 2D. Internal sensors monitor humidity, and both internal and assist gas pressure. Improved water cooling provides reliable, continuous cutting at 15 kW.
Features:
- Internal sensors determine the condition of all optics
- Fully sealed, end-user, service-friendly optics
- Internal process monitoring detects pierce through and loss of cut
- Standard fiber clamp
- Standard nozzle cooling and optional air blast
- No exposed wires to snag or break
- Laser Mech®’s patented height sense technology
Specifications:
CUTTING HEAD
- Power Rating (1030-1090 nm): up to 15 kW
- Nominal Collimating Lens: 100 mm
- Nominal Focusing Lens: 150 mm, 200 mm
- Aperture (Max.): 0.18 NA
- Nozzle Orifices: 1.0 mm to 5 mm
- Nozzle Styles: Single Orifice, Double, Multi-Hole Shower, Custom
- Assist Gas Pressure: up to 20 BAR
- Focal Point To Nozzle Adjustment: +14 mm to -17 mm (150 Focus), +25 mm to -34 mm (200 Focus)
- Fiber Connections: QD (LLK-D, LCA), QBH (HLC-8)
- Weight: ~10.4 kg
HEIGHT SENSOR
- Standoff Distance Range (1 mm Recommended): 0.2 mm to 8.0 mm
- Calibration: Multi-Point Calibration
- Response Time: <1 msec.
- Temperature Stability: ±5% of Standoff Setting, 0° to 45° C
- Power Requirement: 24 V
- Output (Optimized Curve For Flat Metal or Linear Signal): 0-10 V Analog

FiberCut® RAa
-
Laser Mechanisms’ FiberCUT® RAa laser processing head collimates and focuses a fiber-delivered laser beam and directs it, along with cutting gas, through its nozzle for optimal metal cutting. The head features programmable focus position adjustment which delivers exacting cutting in materials with varying thickness and fastest possible piercing. FiberCUT® RAa’s nozzle also senses the required tip standoff from the workpiece and automatically maintains that standoff through its internal drive system.
- 3-dimensional cutting with fiber-coupled laser for 16 kg robots
- Up to 30 mm of programmable focus-to-tip adjustment
- Low moving mass minimizes inertia transfer to robot support arm
- Right angle entry of all connections, including fiber, provides tight access to parts,
easy cable routing and stress reduction on input fiber
Features:
- Complete system consists of cutting head, motorized fiber collimator and linear drive with position monitoring
- Cam-operated drive system with axial crash protection
- All wiring and assist gas lines are internally plumbed – avoiding costly snags and breaks
- Upper cover glass to protect fiber/collimator optics
- Provides error signals in case of collision, over-temperature and exceeding the operating range
- Sealed beam path
- Multiple gas jet tip options to optimize cutting quality and speed
- X-Y beam-to-tip centering adjustment
- Works with all leading fiber-delivered laser systems up to 6 kW with wavelengths of 1030-1080 nm
- Multiple process monitoring capabilities
- Multiple water-cooling aperture specifications for varying (NA or BPP) lasers
- Engineered for the harsh factory floor environment
- Internal, low-noise height sensing system is unaffected by cutting plasma or piercing debris
FiberMINI® Series
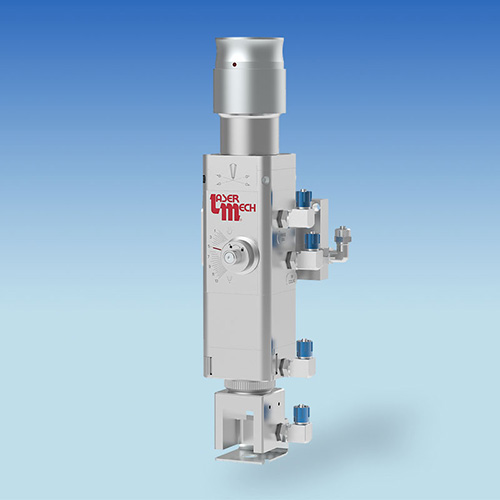
FiberMINI®
-
FiberMINI® is a simple, yet flexible, design that allows the user to configure a compact, lightweight processing head to their specific Fiber Laser application. Available in straight and right-angle versions, the head is capable of cutting a wide range of materials and is also available in various welding configurations (see FiberMINI® Weld). FiberMINI® delivers both user-friendly operation and reliable performance at an attractive price.
Features:
- Available with or without capacitive height sensing
- Temperature sensors protect optics and minimize the chance of overheating
- 13 mm of lens movement to set focus
- Quick, toolless access to the sealed cover glass
- Flexible design to optimize a wide range of spot sizes
- Compact, lightweight design
- Nozzle cooling for use with highly reflective materials
- Purge air and sealed optics
Specifications:
CUTTING HEAD
- Power Rating: up to 4 kW
- Nominal Focusing Lens (Singlet, Fused Silica, λ 1025-1080 nm): 100 mm, 125 mm, 150 mm, 200 mm
- Clear Aperture: 25 mm
- Nozzle Orifices: 1 mm to 4 mm
- Nozzle Styles: Single Orifice, Double, Multi-Hole Shower, Custom
- Assist Gas Pressure: up to 20 BAR
- Focal Point To Nozzle Adjustment: -4 mm to +9 mm
- Weight: ~1.5 kg (Base configuration. Weight will vary based on options added)
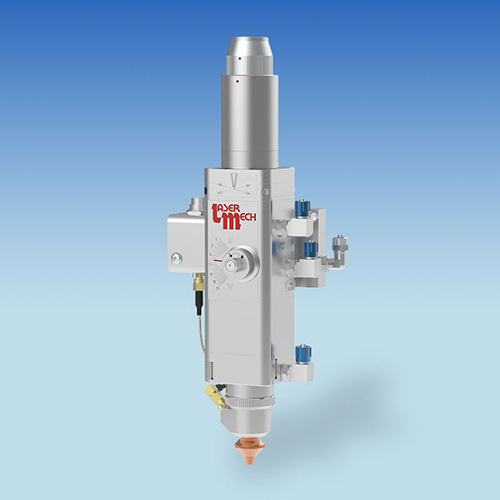
FiberMINI® Weld
-
At only 55 mm square around its central core, FiberMINI® Weld is an ultra-compact, lightweight welding head for all fiber-delivered, solid-state laser systems to 4 kW.
FiberMINI® Weld has a simple, yet flexible design that allows Laser Mech® to optimize the processing head to the end user’s requirements. Optics are protected against contamination by an easily accessible cover glass. Offered with either straight or right angle fiber inputs, FiberMINI® Weld delivers both user-friendly operation and reliable performance at an attractive price.
Available in focal lengths to 400 mm, FiberMINI®Weld features 13 mm of manual focus adjustment, optional camera viewing and an effective air knife to help extend the life of the cover glass.Features:
- Available in focal lengths to 400 mm
- 13 mm of lens movement to set focus
- Effective air knife to help extend the life of the cover glass
- Quick and easy access to the cover glass
- Flexible design to optimize spot size
- Compact, lightweight design
- Optional camera viewing
- Models available for most popular fiber connections
Specifications:
- Power Rating: up to 4 kW
- Clear Aperture: 25 mm
- Collimator Focal Lengths: 35 mm, 60 mm, 75 mm, 100 mm
- Focusing Lenses: 100 mm to 400 mm
- Fiber Connections: QD (LLK-D, LCA), QBH (HLC-8), Q5 (LLK-B) [Others available on request]
- Weight: ~1.5 kg (Base configuration. Weight will vary based on options added)
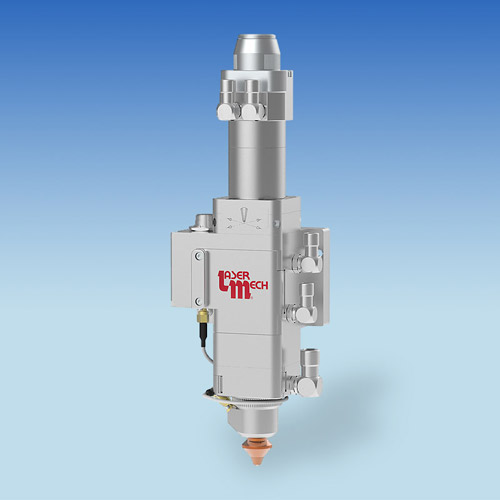
FiberMINI™ AF
-
FiberMINI® AutoFocus (AF) is a compact, lightweight design optimized for flat sheet Fiber Laser cutting. The head is capable of processing a wide range of materials with automatic, programmable focus. FiberMINI® AF delivers both user-friendly Âoperation and Âreliable Âperformance at an attractive price.
Features:
- Compact, lightweight design
- Flexible design allows a wide range of spot sizes
- 14 mm of programmable autofocus to set focus position
- Temperature sensors protect optics and minimize the chance of overheating
- Quick, toolless access to the sealed cover glass
- End-user serviceable focus lens
- Sealed optics and purge air option
- Nozzle cooling for use with highly reflective materials
- Laser pierce, air blast option
FiberWELD® Series
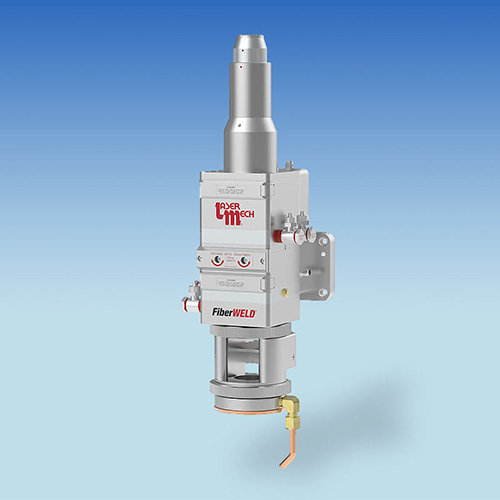
FiberWELD®
-
Engineered for harsh production welding applications with a fiber-coupled laser, FiberWELD®is a robust head with simplified plumbing of coolant and gases. FiberWELD®’s easily accessible, protective cover glass helps extend the life of internal optics. Per the end user’s processing requirements, FiberWELD® can be configured with straight or right-angle fiber input, camera viewing, wire feed, air knife, coaxial nozzle, weld monitoring and special focusing optics (twin spot and rectangular).
Features:
- For all leading fiber-delivered laser systems up to 8 kW
- Fiber collimator from 100 mm – 190 mm
- Focusing lenses from 200 mm – 1000 mm
- Available with either a straight-through laser beam path (FiberWELD® ST) or left or right-hand, 90° fiber connection (FiberWELD® RA)
- Temperature monitored optics
- Cover glass contamination monitoring/warning
- Quick and easy access to the cover slide (no tools required)
- Cross-flow air knife with 360° adjustment
- All optics are housed in environmentally-sealed compartments to prevent contamination from process smoke and debris
- Stainless steel cooling passages
- Compatible with all weld-monitoring systems – including the latest technologies
Specifications:
- Power Rating: up to 8 kW
- Clear Aperture: 48 mm
- Collimator Focal Lengths: 100 mm, 120 mm, 150 mm, 190 mm
- Focusing Lenses: 200 mm to 1000 mm
- Optional Custom Optics: Twin Spot, Rectagular
- Fiber Connections: QD (LLK-D, LCA), QBH (HLC-8), LLK-B (Q5)
- Weight: ~4 kg (Base configuration. Weight will vary based on options added)
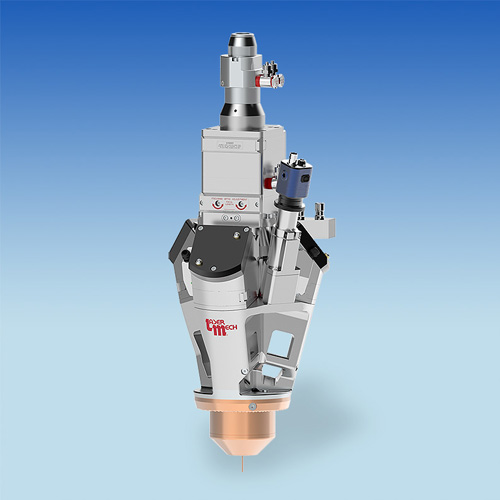
FiberWELD® DHc
-
Laser Mechanisms’ FiberWELD® DHc is a compact material deposition head that is engineered for high duty cycle production applications with low to high power, fiber-delivered lasers. The head’s advanced optical design permits wire to be fed directly into the beam path – coaxially to the beam and right into the center of the melt pool. This allows the additive or cladding process to have total directional independence. FiberWELD® DHc also delivers extended beam-on-time for 24/7 operation.
Features:
- For all fiber-delivered laser systems (Diode, Fiber, Disc) up to 8 kW
- Hot wire compliant
- Direct-cooled wire feed
- All optics are housed in sealed compartments to prevent contamination from process smoke and debris
- Temperature monitored optics
- Cover glass contamination monitoring/warning
- Cross-flow air knife
- Omnidirectional processing
- Direct-cooled, back-reflection protection
- Quick and easy access to the cover slide (no tools required)
- Direct water-cooled nozzle
- Optional camera-based vision and process monitoring
Specifications:
- Power Rating: up to 8 kW
- Clear Aperture: 44 mm
- Collimator Focal Lengths: 100 mm, 125 mm, 150 mm, 175 mm, 200 mm
- Focal Length: 300 mm
- Wavelengths (Diode, Fiber, Disc): 900 – 1100 µm
- Fiber Connections: QD (LLK-D, LCA), QBH (HLC-8), HLC-16
- Wire Sizes: 0.6 – 1.6 mm
- Weight: ~18 kg* (Base configuration. Weight will vary based on options added)
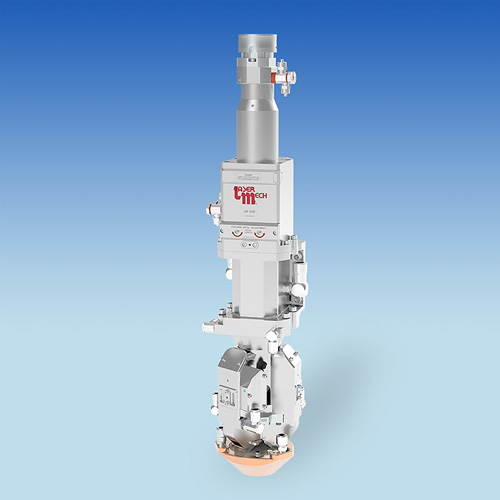
FiberWELD® DHµ
-
FiberWELD® DHµ is a compact, direct energy deposition (DED) head for medium power, fiber-based laser manufacturing applications. The head features transmissive and reflective optics to maximize space while minimizing focus shift – even in high duty cycle processes. FiberWELD® DHµ’s advanced optical design permits wire to be fed directly into the beam path – right into the center of the melt pool. This allows the laser process to have total directional independence. Also, FiberWELD® DHµ’s easily accessible, protective cover glasses extend the life of internal optics.
Features:
- For most fiber-delivered laser systems (Diode, Fiber, Disc) up to 6 kW
- All optics are housed in sealed compartments to prevent contamination from process smoke and debris
- Temperature monitored optics
- High-pressure cross-flow air knifes
- Omnidirectional processing
- Hot wire compliant
- Quick and easy access to the cover slide
- Direct-cooled wire feed
- Direct-cooled, process heat shield protection
Specifications:
- Power Rating: up to 6 kW
- Clear Aperture: 48 mm
- Collimator Focal Lengths: 100 mm, 150 mm
- Focusing Optic: 400 mm
- Wavelengths (Diode, Fiber, Disc): 900 – 1100 µm
- Fiber Connections: HLC-16, QD (LLK-D, LCA), QBH (HLC-8), LLK-B (Q5)
- Wire Sizes: 0.8 – 1.6 mm
- Weight: ~10 kg (Base configuration. Weight will vary based on options added.)
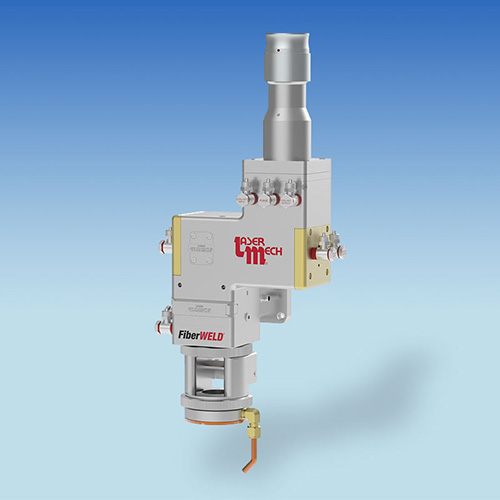
FiberWELD® HR
-
Engineered for high duty cycle production welding applications with medium to high-power, fiber-delivered lasers, FiberWELD® HR is a robust head with direct-cooled reflective optics that minimize focus shift. FiberWELD® HR’s easily accessible, protective cover glass helps extend the life of internal optics. Per the end user’s processing requirements, FiberWELD® HR can be configured with straight or right-angle fiber input, camera viewing, wire feed, air knife, weld monitoring and special focusing optics (twin spot and rectangular).
Features:
- Robust, direct-cooled reflective optics minimize focus shift
- For all fiber-delivered laser systems up to 30 kW
- Available with either a straight laser beam path or left or right-hand, 90° fiber connection
- Temperature monitored optics
- Cover glass contamination monitoring/warning
- Quick and easy access to the cover slide (no tools required)
- Cross-flow air knife with 360° adjustment
- All optics are housed in environmentally-sealed compartments to prevent contamination from process smoke and debris
- Compatible with all weld-monitoring systems – including the latest technologies
- Available HLAW mounting bracket
- Fiber collimator from 100 mm – 200 mm
- Focusing optics from 200 mm – 1000 mm
Specifications:
- Power Rating: up to 30 kW
- Clear Aperture: 48 mm
- Collimator Focal Lengths: 100 mm, 120 mm, 150 mm, 200 mm
- Focusing Mirrors: 200 mm to 1000 mm
- Optional Custom Optics: Twin Spot, Rectagular
- Fiber Connections: QD (LLK-D, LCA), QBH (HLC-8), LLK-B (Q5)
- Weight: ~6 kg (Base configuration. Weight will vary based on options added)

FiberWELD® DH
-
FiberWELD® DH is a robust head with direct-cooled reflective optics that minimize focus shift. It’s engineered for high duty cycle production applications with medium to high power, fiber-delivered lasers. The head’s advanced optical design permits wire to be fed directly into the beam path – right into the center of the melt pool. This allows the laser or cladding process to have total directional independence. Also, FiberWELD® DH’s easily accessible, protective cover glasses extend the life of internal optics.
- Robust, direct-cooled reflective optics minimize focus shift
- For all fiber-delivered laser systems (Diode, Fiber, Disc) up to 30 kW
- All optics are housed in sealed compartments to prevent contamination from process smoke and debris
- Temperature monitored optics
- Cover glass contamination monitoring/warning
- Quick and easy access to the cover slide (no tools required)
- Cross-flow air knife
- Omnidirectional processing
- Hot wire compliant
- Direct-cooled wire feed
- Direct-cooled, back-reflection protection
- Optional camera-based vision and process monitoring
Weld Monitoring
LDD Weld Monitoring
LDD Weld Monitoring
-
Laser Depth Dynamics’ (LDD) patented imaging technique is the only technology that delivers direct, geometric measurements of laser weld penetration – during the weld. Inline Coherent Imaging, or ICI, uses a low-power IR laser beam to gauge distances and the extra distance from the material surface to the bottom of the keyhole is the weld penetration. This measurement beam is directed through the same optics as the welding beam, getting focused right to the bottom of the keyhole’s vapor channel and returning the actual penetration in real time. The resulting data is equivalent to a lengthwise section of the weld, delivered instantly, with no additional labor and without destroying the part. No more destructive testing and weld quality data saved for each weld produced.
Laser Mechanisms has designed the LDD system seamlessly into all of its FiberWELD® heads and it can also be integrated into Laser Mech® CO2 beam delivery systems
FineKerf™
FineKerf™
-
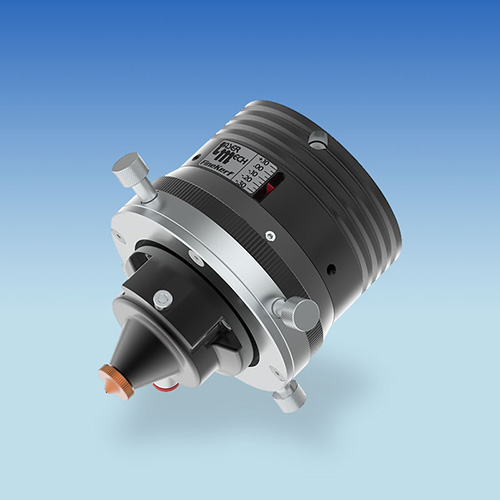
Laser Mechanisms’ FineKerf™ processing head delivers fine kerf cutting for the precision manufacturing of small parts. Engineered as a rugged, industrial-style unit for use in the medical processing field, FineKerf™ is capable of consistently delivering kerf widths as low as 8 microns in stainless steel. And the head delivers a true perpendicular laser beam for clean cuts without angle. Easily retrofitted to existing laser heads, the unit also conveniently mounts on a variety of lasers, including fiber lasers, by simply changing the X-Y mount plate.
- Independent adjustment of laser beam and view port
- Laser safety protection through view port
- X-Y tip centering
- X-Y adjust and lock feature on incoming beam
- Precision three element lens set – corrected for vision use
- External focal point to gas jet tip adjustment with a range of .350″
- 10X, adjustable eyepiece with fine grain crosshair
- View While Lasing feature
- Nikon® optical system
Scanning / Trepanning
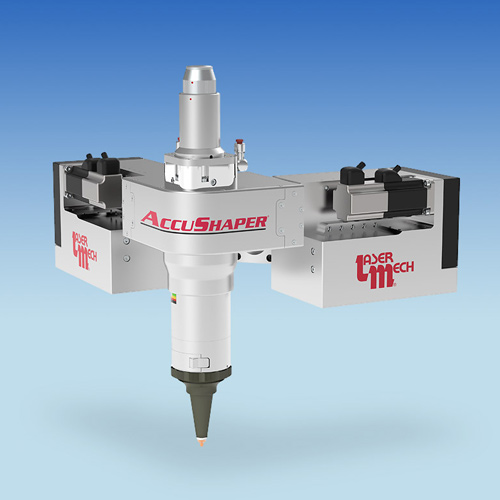
FiberScan™ MP
-
Laser Mechanisms’ FiberSCAN™ MP is a scanning head for mid-power laser sources including Fiber, Disk and Diode lasers. Available for collimated beams up to 30 mm diameter, FiberSCAN™ MP can deliver 10+ kW of laser power to any point within the system’s field of view. The rugged design is optimized for the long processing times required in applications such as continuous welding on roll forming systems and additive manufacturing of sizeable structures. In addition, high-speed operation up to1 kHz in a smaller field enables wide gap seam welding and laser stir “wobble” welding of materials.
Features:
- For all leading fiber-delivered laser systems up to 10+ kW
- Focusing lenses from 200 mm – 1000 mm
- Temperature monitored optics
- Cover glass contamination monitoring/warning
- Quick and easy access to the cover slide (no tools required)
- Cross-flow air knife with 360° adjustment
- All optics are housed in environmentally-sealed compartments to prevent contamination from process smoke and debris
- Stainless steel cooling passages
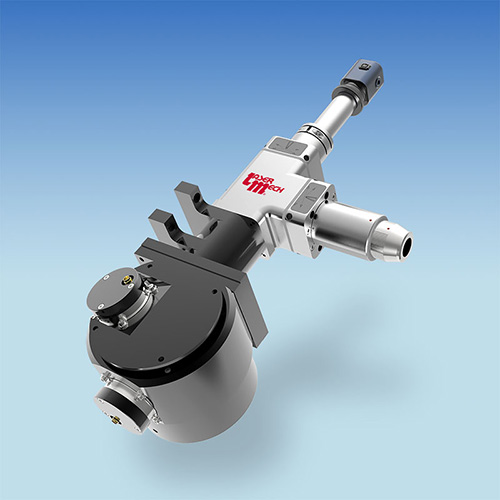
FiberScan™
-
Laser Mechanisms’ FiberSCAN™ option provides both high speed and accuracy in a compact, easy-to-control package.
Available for up to 20 mm diameter beams, FiberSCAN™ can deliver up to 1 kW of laser power to any point within the system’s field of view. An available option for all wavelengths from 258 nm to 10.6 μm, these galvo-based solutions can be used with standard F-Theta or telecentric flat-field lenses for large processing areas. For smaller fields, standard focus lenses can be used as an economical alternative. In addition, drilling nozzle systems can also be employed to allow coaxial gas assist to the high speed galvo capability for exceptional micro-drilling and cutting. A larger gas nozzle can be supplied for coaxial shield gas in micro spot and seam welding applications.
Revolutionary galvo technology combined with angular position encoders means the fastest and most accurate processing possible – usually more than twice as fast as standard units.
The system can be controlled with standard XY2-100 protocols or any other galvo control system. Also available is a Laser Mechanisms’ controller for easy programming of standard shapes and interface to a PLC. In addition, Laser Mechanisms provides all of the necessary beam delivery and expertise to condition and deliver the laser beam to the galvo unit through focus, so that the system is fully optimized from the source to the focus spot.
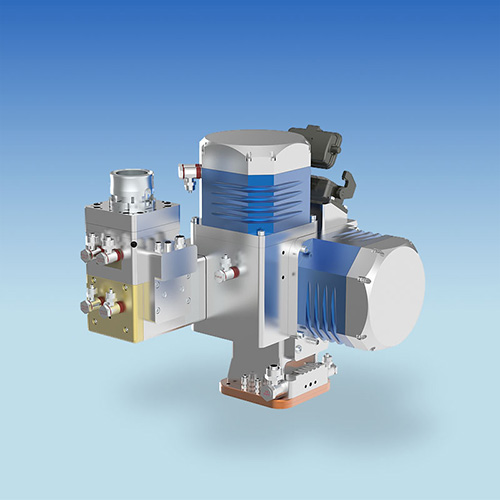
FiberScan™ HR
-
Laser Mechanisms’ FiberScan™ HR is a scanning head for high-power laser sources including Fiber, Disk, CO2 and Diode lasers. Available for collimated beams up to 48 mm diameter, FiberScan™ HR can deliver 20+ kW of laser power to any point within the system’s field of view. FiberScan™ HR employs direct water-cooled copper optics for all wavelengths throughout its optical path to provide reliable, ultra high-power capability with minimum thermal focus shift. The rugged design is optimized for high power and long processing times required in applications such as continuous welding on roll forming systems, additive manufacturing of sizeable structures and large area or volume cladding. In addition, high-speed operation up to 500 Hz in a smaller field enables wide gap seam welding and laser stir “wobble” welding of materials that are difficult to process.
Features:
- Built for high laser power (20+ kW)
- Modular design can be configured for specific applications
- Water-cooled reflective optics including collimator
- Compact optic drive system
- Sealed housing and air knife
- Optional seam tracking
- Optional height sensor and autofocus for small area scanning
- Optional real-time weld monitoring
Specifications:
- Laser Power: 20+ kW
- Scan Motion: Programmable frequency & waveform with feedback
- Scan Frequency (depends on feature size): up to 300 Hz for 1 mm circle
- Shapes: Standard shape library with custom shape capability
- Field of View (depends on focal length): 40 mm x 40 mm (1.6″ x 1.6″) for f=350 mm(14″)
- Seam Tracking: Optional
- Interfacing: Start/Stop; scan program; orientation of weld line
- Electrical Supply: 90-246 VAC, 1-Phase, 47-63 Hz, 14A @115 VAC Typical, 7A @230 VACTypical
- Dimensions: 300 x 350 x 320 mm3 (12″ x 14″ x 13″)
- Weight: ~25 kg (~55 lbs.)
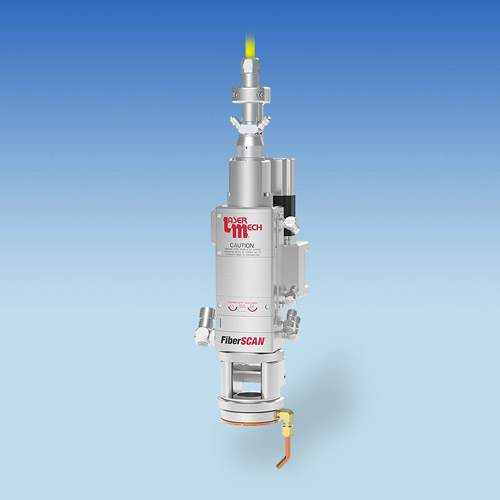
FiberScan™ RW
-
With a laser power rating up to 6 kW, FiberScan™ RW uses rotating wedges to create beam spinning at focus for applications such as stir welding, and can also generate full shapes and feature formation up to 48 mm field size.
The laser system control communicates with FiberScan™ RW’s onboard controller via common protocols including discrete I/Os or different Fieldbus options. Nearly any 2D shape is possible and most common shapes are stored in the Shape Commander™ library. As with other Laser Mechanisms’ processing heads, FiberScan™ RW’s software continually monitors the condition of the optical elements in the head; detecting presence, temperature and scattered light.
FiberScan™ RW can be integrated with all available fiber connectors (QBH, QD, LCA, etc.) and to any robot or motion system.
Specifications- Power Rating (Fiber Laser): up to 6 kW
- Beam Diameter (Max. NA 0.12, Full Beam): 23 mm
- Focusing Lens (Standard Focal Length): 300 mm
- Optional Focal Lengths (Inquire): 250 mm to 500 mm
- Focus Lens Diameter: 38.1 mm
- Collimator Focal Length (Standard) : 75 mm
- Working Envelope: ø48 mm @ 300 mm F
- Beam Motion (Circles or 2D Shapes): 5° Rotary Wedges
- Max. Speed: 50 Hz Continuous
- Remotely Monitored Functions: Optics Temp., Presence and Position
- Air Knife/Cross Jet Rotation: Fixed or 360° Rotation
- Copper Aperture (Varies With Pattern): 28 mm
- Fiber Connections: QD (LLK-D, LCA), QBH (HLC-8)
- Cooling (Room Temperature Water): 2.5 L/min.
- Weight (Including Cable, Hoses and Mount Plate): ~7.0 kg
- Shape Selection: Shape Commander™ Software
- Options: Off-axis Aiming Laser, Camera
CONTROLLER:
- Forced-Air Cooled Enclosure (LxWxH): 500 mm x 400 mm x 220 mm
- Interfacing: 32 Digital + 2 Analog I/Os, Optional Fieldbus: Ethernet/IP, Profinet, DeviceNet
- Electrical Supply: 85-264 VAC, 1-Phase, 47-63 Hz
Articulated Arms
Articulated Arms
-
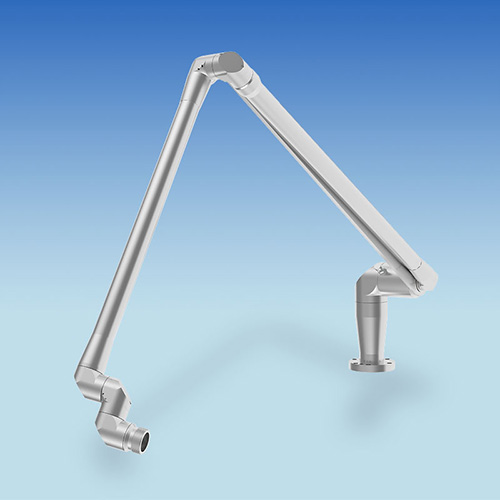
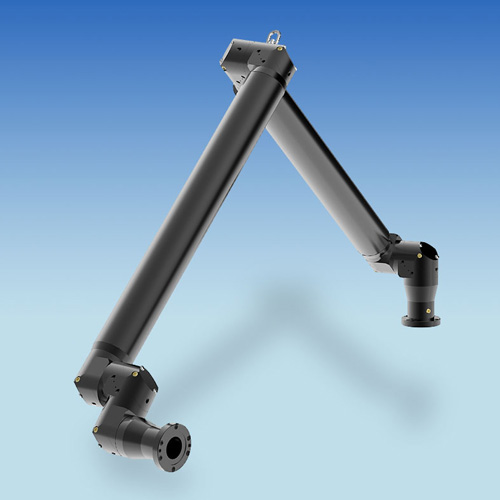
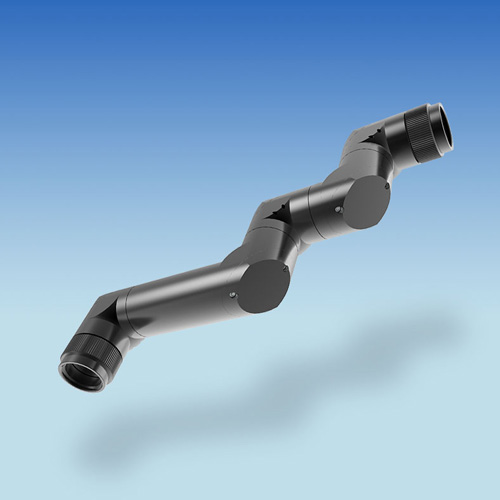
Laser Mechanisms’ articulated arms are a flexible optomechanical solution for connecting laser sources to the process whether for industrial, medical or military applications. The arm provides an enclosed beam path with a controllable atmosphere for safety and cleanliness. The constant beam path distance provides a fixed beam size at the output. The arm can be configured into many configurations of length, joints and aperture to fit most applications.
The unique ability of the arm to form a flexible link allows for any mechanical variations between the laser and coupled device. The arm can minimize the machine foundation requirements and structural rigidity of the motion system while providing freedom of motion to the process for complex and hard to reach areas.
Specifications:
- Power Rating: up to 8 kW*
- Clear Apertures: 15, 19, 35 and 50 mm
- Wavelengths: All
- Water Cooling: Optional*
- Maximum Tube Length: 2.5 M*
- Angular Bias (Static Alignment): <0.7 mrad*
- Beam Center Deviation (Static Alignment): <0.5 mm*
- Operating Temperature: -50° C – +55° C
*Specifications dependent on model chosen and does not apply to all arms.
AccuFiber™ Series
AccuFiber™ Series
-
AccuFiber™ Laser Processing heads are a flexible, modular design that deliver accurate focusing with unlimited configuration possibilities. The modular aspect of the AccuFiber™ Series supports a variety of setup and process options. Offered par-focal versions can accommodate multiple focal lengths without changing the overall length of the head. In most configurations, a second lens drawer is included for the cover glass allowing ease of access. AccuFiber™ heads can be configured for cutting or welding with a wide range of collimator choices and focusing lengths. AccuFiber™ heads provide simple and intuitive adjustments for collimation, beam centering, viewing and focus setups.
Features:
- Straight or right angle fiber input
- Quick and easy access to optics
- Capacitive height sensing (cutting)
- Cross Jet or Coaxial nozzle (welding)
- Deionized water compatible (stainless steel circuit)
- Optional crash protection
- Optional direct-cooled optics
- Camera viewing option
Specifications:
- Power Rating: 6 kW (16+ kW direct-cooled option)
- Clear Aperture: 24, 35 and 48 mm options
- Collimation Focal Lengths: 60, 75, 100, 120, 150, 200*
- Focusing Lens: Various (up to 1000 mm)*
- Fiber Connections (others available on request): QD (LLK-D, LCA), QBH (HLC-8), Q5 (LLK-B)
*Specifications dependent on model chosen and do not apply to all configurations.
Modular Delivery
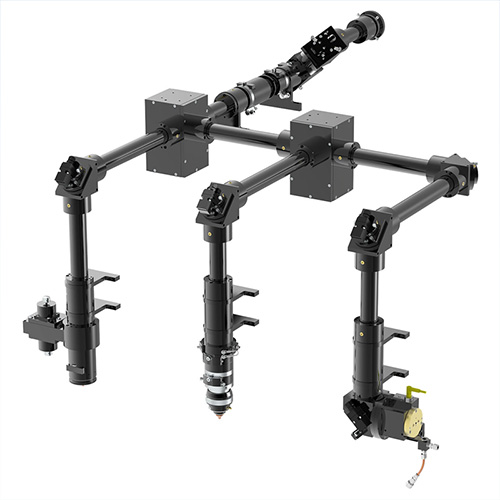
Large Aperture
- The image above only represents a sampling of the large aperture components Laser Mechanisms has to offer. Please contact a Laser Mech® Sales Engineer for complete information and for assistance on configuring a custom solution for your laser application.
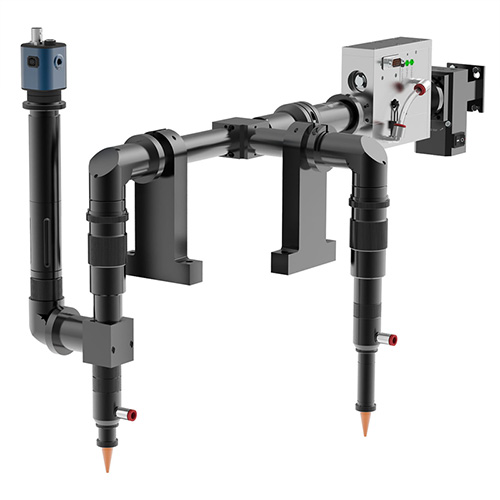
Small Aperture
- The image above only represents a sampling of the small aperture components Laser Mechanisms has to offer. Please contact a Laser Mech® Sales Engineer for complete information and for assistance on configuring a custom solution for your laser application.
Custom Beam Delivery
- Laser Mechanisms provides custom beam delivery solutions for even the most demanding laser applications. The gallery below only represents a small sampling of our engineering capabilities. Please contact a Laser Mech®Sales Engineer for assistance on configuring a custom solution for your laser application.
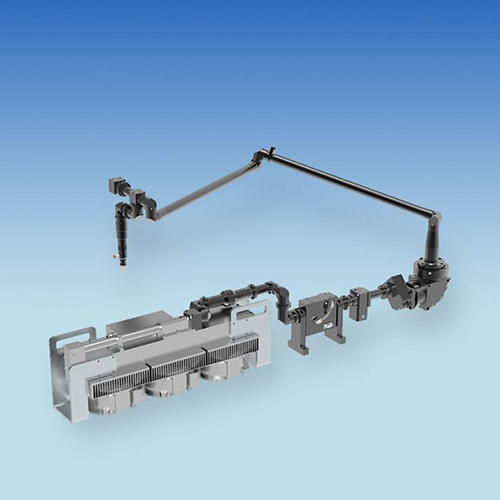
Articulated Arm-based CO2 delivery system.
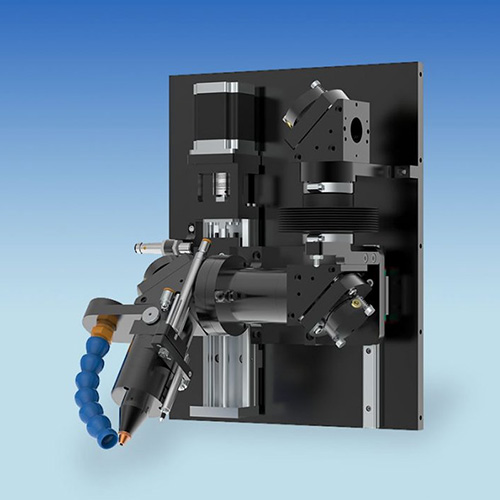
Custom cutting head with integrated z-axis.
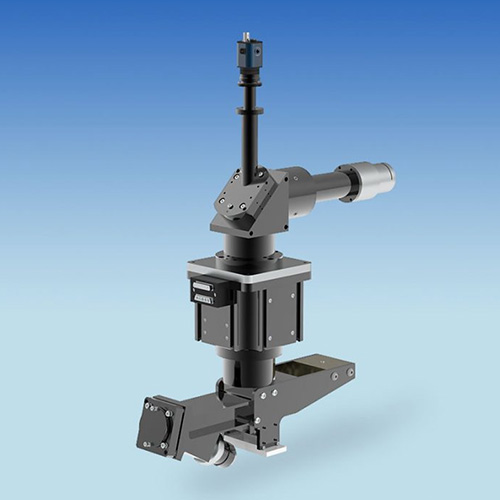
Precision Rotary Welder.
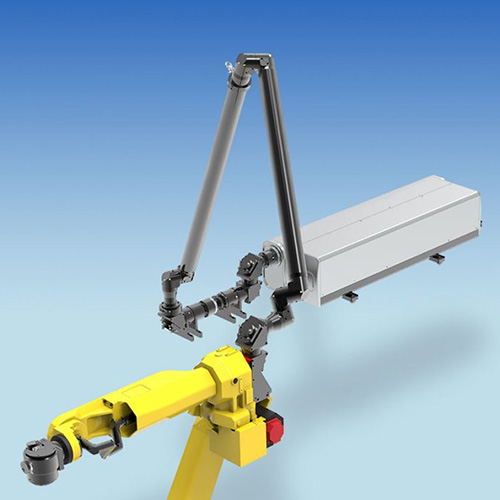
Articulated Arm remote scanning system.
Beam Diagnostics
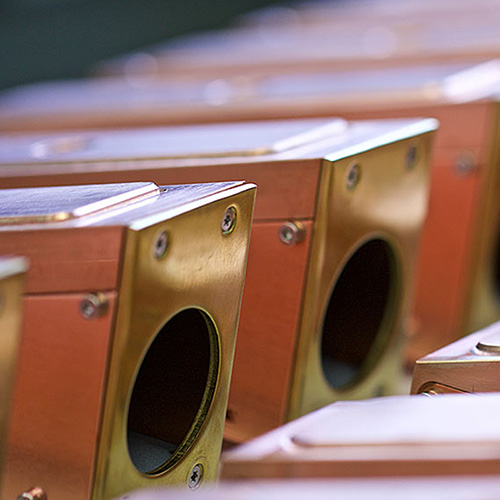
Beam Dissipation: Absorbers
-
Laser beam sources are sometimes operated under full load (servicing, special operating modes), without the emitted laser radiation being utilized immediately for a processing task. In these cases > 99% of the radiation must be absorbed. Many beam sources therefore contain a PRIMES absorber.
Laser material processing systems in which the machining process does not completely absorb the laser radiation or the radiation must be “captured” (for example during a workpiece changeover) pose a similar challenge.
PRIMES absorbers are used in these instances as beam dumps. Since laser radiation is mostly not fully absorbed within laser beam diagnostics either (exception: measurement of laser beam power) various special solutions are used, which are either integrated into the diagnostics system or are needed in addition in order to guarantee the safety of people and machinery.
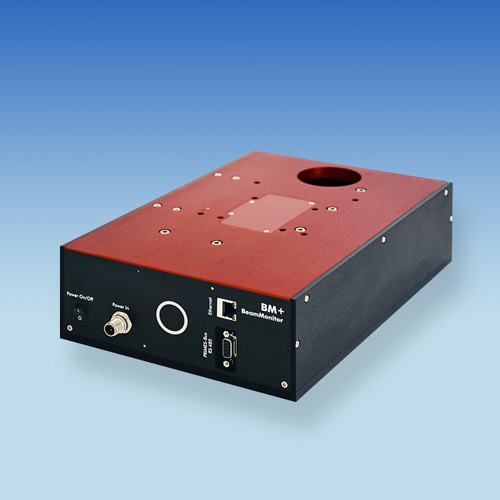
Beam Measurement: BeamMonitor BM+
-
The PRIMES BeamMonitor BM+ is a measuring device for performing beam diagnostics on unfocused, continuous irradiation of CO2 and solid-state lasers with higher outputs.
With the BeamMonitor BM+, the user can quickly and reliably measure the beam parameters, such as the spacial power density distribution. Analyzing and documenting the laser parameters makes it possible to optimize the processing procedure or identify an incorrect beam position or incorrect lens alignment.
In practice, laser beams are “customized” for specific areas of application using telescopes and adaptive lenses. When this happens, the beam diameter as well as the divergence are changed dynamically. This makes it possible to change the focus dimensions or shift the focus position toward the laser beam axis in systems for laser cutting or laser welding. Here the focus is on “penetration” through the material surface and it is “pushed into” the material for the actual cutting process.
During laser welding, dynamic adjustments of the laser beam make it possible to cut with one setting and weld with another.
The BM+ is also suitable for use in the field of quality assurance or laser approval: Deterioration on laser lenses is one of the main causes of problems in laser material processing that can reduce the quality of the processing results considerably.
Diodes and other solid-state lasers are checked in the collimated range and can, for example, be assessed with relatively little effort.
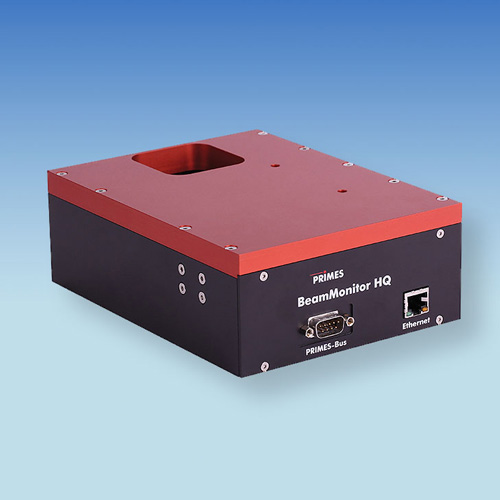
Beam Measurement: BeamMonitor-HighQuality
-
This reference system for raw beam diagnostics of CO2 lasers has been used successfully for a number of years. In fact the PRIMES BeamMonitor-HighQuality (BM-HQ) replaces the typical plexiglass burns used to identify the beam profile or beam symmetry.
The diagnostic device enables quick measurement with high precision. This is guaranteed by a detector with a high dynamic range.
The BM-HQ is the perfect device for analyzing your laser beam. The mechanical scanning system measures the power density of collimated laser beams at full power.
Due to its compact design and light weight, the BM-HQ is ideal for integration into material processing systems and for use in servicing.
The laser beam is scanned point by point with a rotating measuring tip. The mirror mount is also moved in a linear fashion to scan the entire beam profile. In this way, a partial beam is diverted and directed at the detector in each instance.
The incoming signal is digitized and transmitted to the evaluation unit. The 14-bit A/D converter and resolution of up to 256 x 128 pixels employed enable an exact analysis even of small disturbances in the raw beam. The device was designed for use in harsh industrial manufacturing conditions and is adaptable in every spatial orientation.
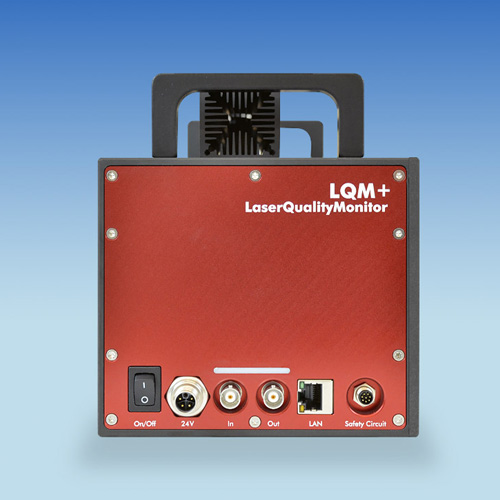
Beam Measurement: LaserQualityMonitor LQM+
-
The PRIMES LaserQualityMonitor LQM+ quickly and automatically characterizes the beam parameters of a beam source. The measuring system is compact, easy to align and can be expanded to meet individual requirements.
Determine Beam Propagations, Analyze Faults
With the LQM+ PRIMES offers an integrated solution for the quick and straightforward analysis of the beam properties of a beam source. The beam propagation of lasers from the UV to NIR range are characterized and certified with this measuring system. Furthermore, errors in the optical structure of resonators of beam imaging systems can easily be analyzed.The characterization of a collimated laser beam with Rayleigh lengths that are typically ten meters requires a significant measurement effort due to the very long measurement ranges of three to six Rayleigh lengths. This form of measurement is normally impossible for reasons of space. For this reason ISO 11146 recommends, in the alternative, the measurement of a caustic generated by focusing in order to determine the diffraction index M2.
The LQM+ generates this device-internal caustic by focusing the irradiated collimated laser beam. The focused beam is displayed enlarged on the CCD chip via several integrated attenuators and a lens. From the two-dimensional power density distribution measured in this way, the LaserDiagnoseSoftware (LDS) determines the radius, position and orientation of the beam. Through the procedures of this measurement system, and repetition of the measurement at various positions in the device, all parameters necessary for the description of the artificial caustic are determined. The electronic exposure time control of the CCD chip expands the dynamic range of the system. This means that in general it is not necessary to alter the filters during a measurement.
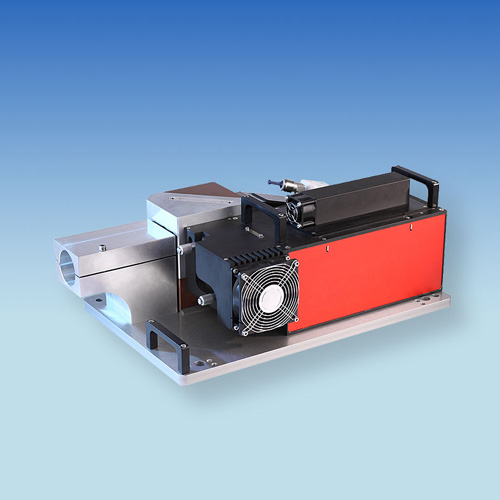
Beam Measurement: HighPower-LaserQualityMonitor
-
LThe PRIMES HighPower-LaserQualityMonitor (HP-LQM) quickly and automatically characterizes the beam parameters of a beam source. The measuring system is compact, easy to align and can be expanded individually.
Determine Beam Propagations, Analyze Faults
With the HP-LQM, PRIMES offers an integrated solution for quickly and simply analyzing the beam properties of a beam source. In combination with the collimator available from PRIMES, the measuring system determines the beam propagation of fiber lasers and fiber-guided beam sources.The detailed characterization of fiber-guided laser sources in respect of beam quality, divergence, beam direction and power cannot generally be carried out without a significant effort and the use of several set-ups.
The HP-LQM with collimator collimates the laser beam propagating divergently from the fiber, reduces the power in two adapted water-cooled attenuators, and directs the measurement beam into the LQM. In combination with a PowerLossMonitor, the irradiated laser power can be measured in parallel via the laser power coupled out to the attenuators and the resulting temperature increase in the cooling medium.
The optics installed in the aperture of the HP-LQM focus the incoming collimated beam in the device. The focused beam is displayed enlarged on the CCD chip via several integrated attenuators and a lens. From the two-dimensional power density distribution measured in this way the LaserDiagnosticsSoftware determines the radius, position and orientation of the beam. Through the procedures of this measurement system, and repetition of the measurement at various positions in the device, all parameters necessary for the description of the artificial caustic are determined. The electronic exposure time control of the CCD chip expands the dynamic range of the system. This means that in general it is not necessary to change the filter during measurement.

Fiber Alignment: FiberTool™
-
Laser Mechanisms’ FiberTool™ is a patent pending device that aids in the alignment of standard multimode fibers used with Nd:YAG, Fiber and Disk lasers. Unlike thermal-based systems that have a delayed response between measurements, FiberTool produces a real-time output signal to the user that is a gauge of the alignment quality of the laser energy into the fiber optic’s core.
For a laser system to launch all of its laser energy efficiently through the fiber optic cable and maintain its beam quality, the laser energy must be focused onto only the core of the fiber optic. This focus spot must be smaller than the fiber core’s diameter and not strike the cladding layer around the core. Adjustments of the fiber launch optics in X-Y and Z are made by the laser user to get the laser beam centered on the core and at the correct focus so the optical spot is smaller than the core diameter.
Proper alignment is accomplished by having a real-time measure of the laser energy that is outside the core diameter. Laser manufacture’s feedback signals do not have the resolution necessary for proper alignment and can result in several hundred watts of wasted energy that can heat the external focus head – potentially causing damage to these optics.
FiberTool provides the only true, real-time measure of the laser energy outside the fiber core and allows the laser operator to adjust the fiber launch system while monitoring this signal until a minimum reading is attained. Any time a fiber is removed and replaced, or a new fiber is connected to the laser source, FiberTool should be used to ensure proper fiber alignment and the condition of the laser launch system.
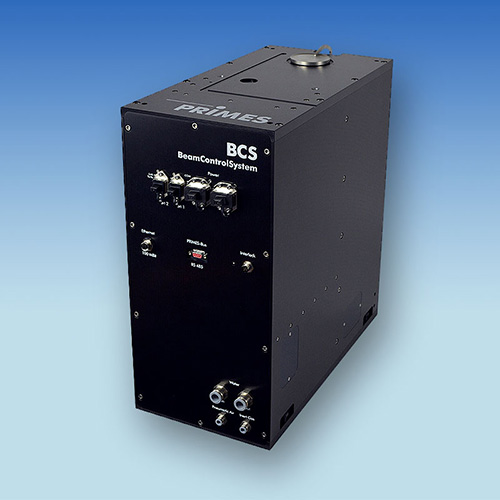
Focus & Power: BeamControlSystem
-
The PRIMES BeamControlSystem (BCS) enables the automatic measurement of the most important laser beam parameters within industrial laser processing lines. Beam power, as well as focal measurements and power density distributions are measured by the system which is shielded, rendering it completely dust-proof.
Features:
- Focal measurement from 0.2 mm to 3 mm
- SPS interface for communications with laser or plant controllers
- Script-controlled automatic measuring sequences
- Monitoring of thresholds for beam parameters
- Electro-pneumatic closing device
- Control and measurement data management via PC
- Fieldbus interface optional for system integration
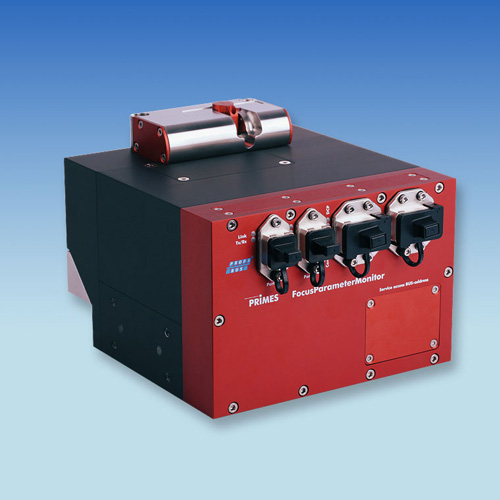
Focus & Power: FocusParameterMonitor
-
The PRIMES FocusParameterMonitor (FPM) enables rapid determination of laser beam parameters. The measuring processes are completely controlled from the existing machine programs.
Measure Laser Beams Quickly
The FocusParameterMonitor (FPM) is the first system on the market that allows quick determination of the laser beam parameters in the process zone. Its advantages: It can easily be integrated into the system, and moreover the fieldbus interface (PROFINET, PROFIBUS) provides easy connection to many industrial control systems and networks.At the beam inlet, an electrical closing device and a protective glass protect the measuring device from contamination. The beam coming from the laser and the processing head is directed into the device via a deflecting mirror.
The beam reaches the measuring components via a beam splitter and a further deflecting mirror. The laser power is measured calorimetrically. For this purpose the laser irradiates the absorber for a defined period. With the help of the known heat capacity, the temperature increase in the test body and the irradiation period, the power is calculated. The camera-based beam analysis unit measures the beam geometry and beam position with a CCD sensor. A fieldbus interface lastly forwards the measurement data data to the system controller. An additional PC is not required.
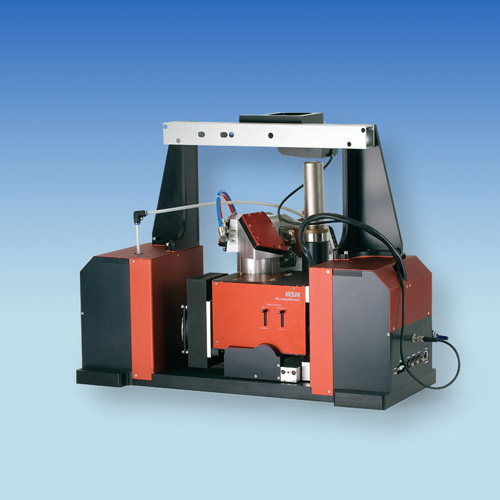
Focus & Power: HighPower-MSM-HighBrilliance
-
Specifically for brilliant high power lasers, expanded with a HighBrilliance option: The PRIMES HighPower-MicroSpotMonitor-HighBrilliance (HP-MSM-HB) can determine power density distributions of SM lasers up to 10 kW average power directly in the focal plane.
Measuring Focal Geometries of Multi-kW Lasers
NIR lasers with high beam quality and high average power are increasingly being employed in laser material processing. With these lasers, focal geometries in the range of 20 to several 100 micrometers can be achieved. No known material can resist the resulting power densities up to the GW/cm² range for long. At this radiation level, conventional scanning measurement techniques for analysis are ruled out. PRIMES has expanded the camera-based focus analysis system, the MicroSpotMonitor (MSM) by a HighBrilliance option specifically for finely focussed high-power lasers.The HighPower-MSM-HighBrilliance determines beam parameters of focused laser beams of multi-kilowatt lasers in the range of 20 micrometres up to a millimetre directly in the process zone – even at full power.
For this purpose, 95% of the laser power is transmitted by a beam splitter through the measurement optic, and absorbed. The remaining five per cent are further attenuated in the measurement optic and destroyed by internal water-cooled absorbers. A part beam with a few milliwatts of power is imaged on the CCD sensor in an enlargement.
The measurement optic was designed for beam powers up to ten kilowatt single-mode. The HighPower-MSM-HighBrilliance is also equipped with a safety circuit that can be connected with the laser and interrupts the laser emission in the event of overheating or device failure. In this way the measuring device is protected from damage.
The HighPower-MSM-HighBrilliance individually measures power density distributions in the focal area of up to 50 measurement planes. The focal caustic is composed of these power distributions. From each individual distribution beam, geometries such as beam position, beam radius and half-axis lengths and also the tilt of the half-axes to the device axis according to the procedure described in standard ISO 11146 (2nd moments and 86 % power inclusion) are determined.
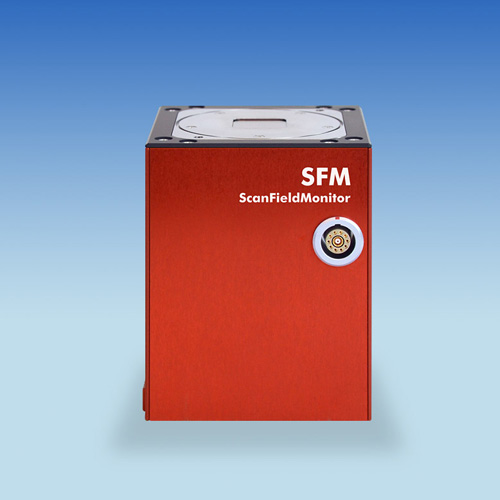
Focus & Scanner Movement: ScanFieldMonitor
-
Know everything about your production parameters in less than 3 seconds with the PRIMES ScanFieldMonitor (SFM). The handheld ScanFieldMonitor features an innovative measuring principle tailored specifically for additive manufacturing processes, and its small glass structure and compact design make it perfect for laser beam diagnostics and process optimization.
A piece of glass with a specific measuring structure is what distinguishes the innovation of the PRIMES ScanFieldMonitor (SFM). A photo diode captures the scattered light while scanning the laser beam over this structure and uses this information for fast laser beam characterization. Not only will it tell you the width of the beam on the measuring plane, but it will also allow you to reconstruct the path, position, and length of the beam and determine its speed of movement.
Complex relations such as pincushion distortion, the merging of overlapping scanning fields, and delays in laser activation and deactivation can be analyzed using special measuring schemes. This can be used to synchronize the laser with its scan unit. Using the 3D machine construction platform to move along the z-axis makes it possible to measure the caustic and determine the evenness of the plane. And
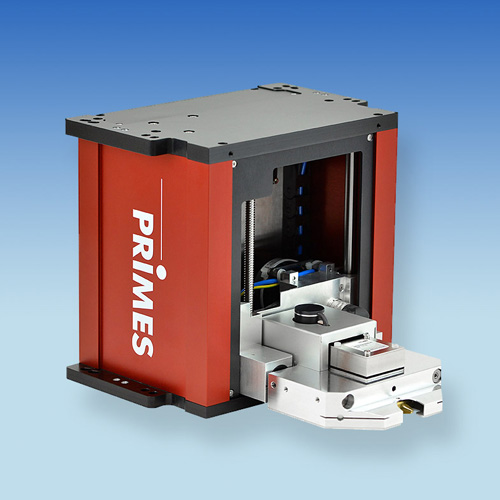
Focus Measurement: FocusMonitor FM+
-
The PRIMES FocusMonitor FM+ analyzes and measures laser beam sources in material processing. FM+ determines the beam properties of focused laser beams, in addition to their geometric dimensions, focal position, the beam parameter product and the beam quality factor. The integrated z-axis allows for automatic measuring of entire caustics up to four Rayleigh lengths – facilitating measuring compliance with quality standards.
An update to the original FocusMonitor, the FM+ features new electronics designed to meet current and future requirements for signal processing and a new motherboard with a 16-bit A/D converter. An Ethernet interface allows for fast and secure data exchange with computers or system controllers. The new mechanical design also accommodates upside down installation without additional components.
The FM+ is an opto-mechanically scanning measuring system that scans the laser beam with a special measuring tip. The unit is equipped with a small hole (typically with a diameter of approximately 20 µm) that lets through a small section of the laser beam. Two reflecting mirrors guide this portion of the laser light to a detector selected and configured depending on the laser power and wavelength. This makes it possible to measure the different laser beam sources and systems solely by selecting the optimal measuring tip and corresponding detector. The high orbital velocity of the rotating measuring tip facilitates analysis of high power densities.
A very high signal-to-noise ratio is achieved thanks to the dynamics of the analog-digital converter used. Very low intensities are shown with equal precision next to the high peak intensities. That is one of the requirements for automatically measuring caustics in the area near the focal point over at least four Rayleigh lengths in accordance with ISO 11146.
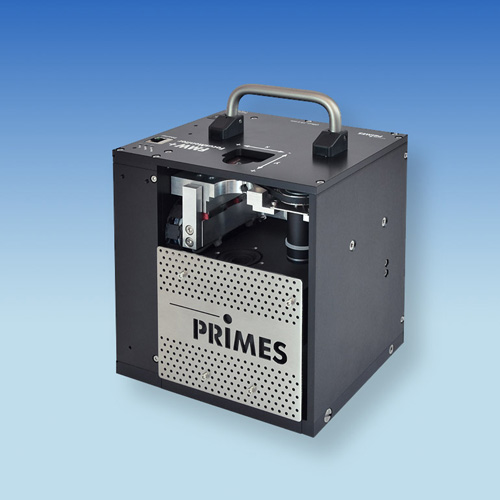
Focus Measurement: FocusMonitor FMW+
-
The FocusMonitor FMW+ is specially designed for analyzing continuous irradiation, even at high beam powers. This universal tool for high-power radiation is the compact version of the proven, globally successful FocusMonitor FM+ with new electronics and an absorber for powers up to 1000 W. With the compact FocusMonitor FMW+, you will know the quality of the laser beam in your processing system and reliably determine the geometric dimensions of the focused laser beam as well as the focal point location in space, the beam parameter product and the beam quality factor M².
The FocusMonitor FMW+ is a mechanically scanning measuring system for measuring focused laser beams with diameters between 100 μm and 3 mm in tight spaces. Unlike the FocusMonitor FM+, the FMW+ does not have its own z-axis. You will therefore have to use the z-axis of the laser system to take caustic measurements.
The device can be used to measure NIR as well as CO2 beams up to 1,000 W laser power. All you need to do is exchange the measuring tip and the corresponding detector. With a maximum size of 8 x 8 mm, the measurement window can be gauged with a resolution of up to 1024 x 1024 pixels.
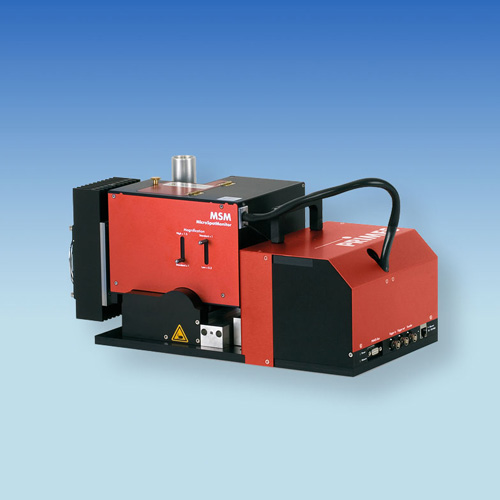
Focus Measurement: MicroSpotMonitor
-
The PRIMES MicroSpotMonitor (MSM) is the ideal tool for checking, monitoring and approving very finely focused laser beams, such as are used for example in micro-material processing. The MSM automatically measures and analyses the spatial beam distribution all around the focus in various z positions.
The focused laser beam is a significant determinant of the quality of the manufacturing result. In most laser material processing, it constitutes the actual tool. The task of the MSM is to certify and monitor this tool for laser systems which are used in micro-material processing. Through regular measurements, any changes in beam profile, focal position or beam dimensions, among other things, can be identified and logged. The results not only assist failure analysis but also the optimization of a process in microprocessing. The various possibilities for using the MSM provides operators with a wide variety of problem-solving approaches for their applications.
The MicroSpotMonitor determines beam parameters of focused laser beams of lasers with average powers up to 200 W in the range from 20 micrometers up to a millimeter directly in the process zone. The purely air-cooled system images the laser beam, attenuated via various beam splitters and neutral density glass filters, on a CCD sensor. The beam position and beam radius are derived from the beam distribution of a level determined in this way. With the help of the integrated z axis and measurement at various positions of the laser beam, the described beam parameters are determined and recorded.
The measurement optics of the MSM are selected individually, depending on the beam source to be measured. Crucial factors here are the wavelength (248 to 1090 nm) and the enlargement determined by the focal diameter (3:1, 5:1, 15:1).
