Precitec

Videos
Loading the player ...
- Offer Profile
- Continuous growth through innovation and enthusiasm
Precitec was founded as a small engineering office in 1971 and is now a worldwide operating company for laser technology and 3D measurement technology. Innovation, customer focus, CAN-DO attitude, spirit, and social responsibility form the core pillars of our trade as a reliable and long-standing business partner.
Precitec has been internationally active for decades and is close to our customers in all important markets with its own subsidiaries.
Product Portfolio
Precitec – 3D Metrology and Laser Technology
3D Metrology
- Innovative sensors and measuring heads for optical thickness and distance measurements. Inline and offline measurements on all materials with highest precision.
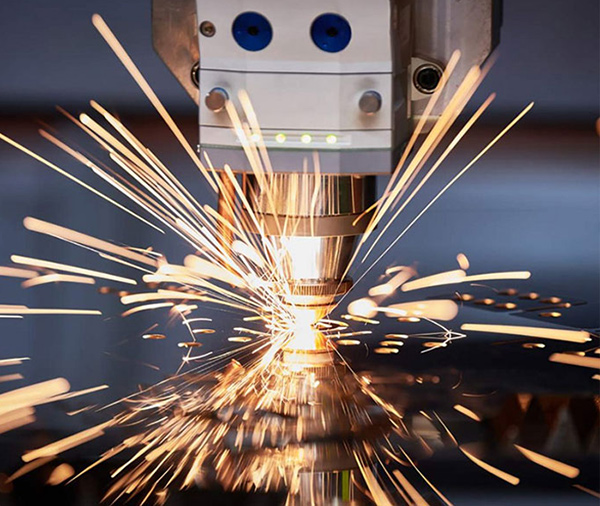
Laser Cutting
- Optimized cutting times and highest precision - powerful cutting optics ensure high dynamics with thin materials and best quality with thick materials.
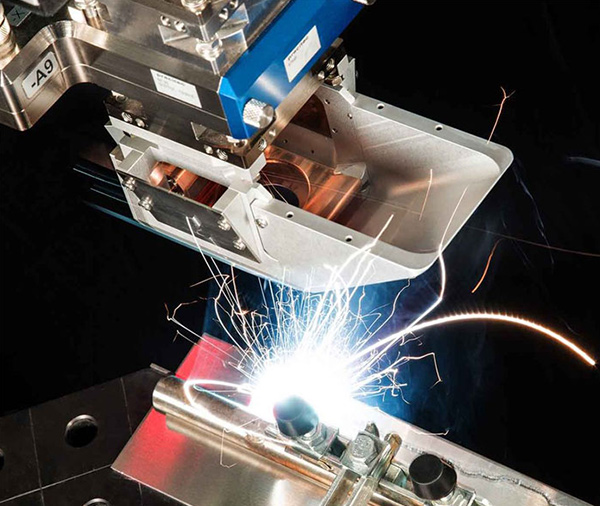
Laser Welding
- High-tech welding optics and intelligent monitoring systems for your laser welding process in 24/7 series production with traceablitiy and documentation.
Our 3D Metrology
- In order to stay competitive, today’s manufacturing
industry needs new state-of-the-art solutions in high-end metrology. What’s more, industry 4.0 is impossible without 3D metrology. The
sensors that enable 3D metrology in automated measuring and quality control systems may seem unspectacular, but they are the precondition for digitalizing and automating industrial processes. Such processes need sensor-based monitoring to remain stable and enable any necessary adaptation.
To meet the needs of high-speed production processes ultra-fast inline measurement results are required. That inline 3D metrology has to be contact-free, precise but robust, function error-free, and deliver high-res 3D imaging. Precitec's products
fulfill all.And this is what we can do for you:
Advice: Our highly qualified sales staff will provide you with comprehensive advice on all aspects of 3D metrology.
Cooperation: We will work closely with you to solve your specific measuring assignment in the best possible way.
Customer-oriented partnership: We will develop individual solutions to your customer-specific problems. All information is of course confidential.
Tested: In our applications laboratory we will carry out test measurements to provide you with clear results.
Flexible: Our modular product portfolio features freely combinable sensors and measuring probes. OEM versions are also available.
Service: We will support you during commissioning and help with any subsequent troubleshooting via our first-class after-sales service. Precitec products in optical 3D metrology

- Founded in 1971, Precitec can point to decades of experience as an innovative market leader in optical sensor and measuring technology. With more than 25,000 systems in the field, our industrially proven 3D optical sensors are renowned for their precision, robustness, and customization to suit specific user requirements. Whatever your needs in advanced 3D metrology – distance, thickness, or optical image sensors – we can meet them through our broad product portfolio of line, multipoint, and point sensors, 2D cameras, and medical eye-tracking devices, and as an OEM sensor supplier.
Point Sensors
- Precitec’s high-precision point sensors based on chromatic confocal or interferometric measurement technology enable non-contact optical thickness measurement, optical distance measurement, and optical topography measurement. Their extremely high lateral and axial resolution and robust applicability under widely differing conditions make them a versatile tool in industrial production. The varied applications for these point sensors range from quality control in the production of glass bottles to silicon wafer treatment in the semiconductor industry.
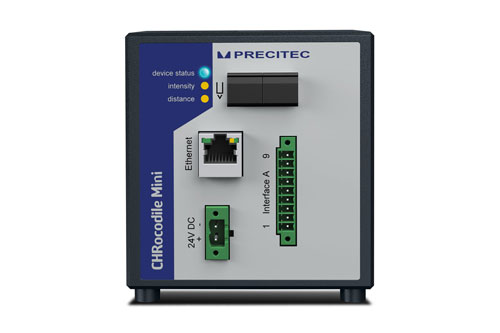
CHRocodile Mini confocal sensor
- Technical data
- Measurements per second: up to 4,000 Hz (optional upgrade 10,000 Hz)
- Measuring range: 0.6 – 10 mm (depending on optical probe deployed)
- CHRocodile Mini interfaces: Ethernet, RS422
- CHRocodile Mini+ interfaces: Ethernet, RS422 + 3 encoder ports + analog output + digital in/out ports
Non-contact thickness & distance measurement with CHRocodile Mini
The CHRocodile Mini offers great flexibility in a small space and is ideal for precise and stable thickness and distance measurements on any kind of material.
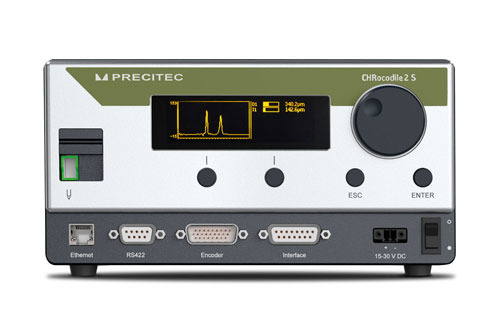
CHRocodile 2S | 2SE | 2S HS
- Technical data
- Measurements/second: CHRocodile 2 S | 2 SE up to 66 kHz; CHRocodile 2 S HS: up to 10,000 Hz
- Interferometric measuring range: CHRocodile 2 S | 2 SE: 2 µm - 180 µm; CHRocodile 2 S HS: 1.5 µm - 150 µm
- Chromatic measuring range: depends on selected optical probe
- Resolution: 3 x 10⁻⁶ x upper measuring range limit
- Synchronization with external devices: trigger input, synchronizing output, 5 encoders input
Quality control via distance measurement sensor
CHRocodile sensors have proven their operating capabilities, measuring performance, and reliability in various industrial applications, such as optical thickness and optical distance measurements. Incorporating high-intensity LEDs, highly sensitive detectors and high-speed electronics in combination with fast Ethernet connection, the CHRocodile 2 S series enables measuring rates of up to 66 kHz.

CHRocodile 2 IT
- Technical data
- Measurements/second:
CHRocodile 2 IT-family: up to 70,000 Hz
CHRocodile 2 IT DW: up to 70,000 Hz
CHRocodile 2 IT HTW: up to 4,000 Hz - Interferometric measuring range in air:
CHRocodile IT-family: 38 µm - 12600 µm
CHRocodile IT DW: 15 µm - 7600 µm
CHRocodile 2 IT HTW: 4 µm - 300 µm - Resolution: 3 x 10⁻⁶ x upper measuring range limit Synchronization with external devices: trigger input, synchronization output, 5 encoder input
- Measurements/second:
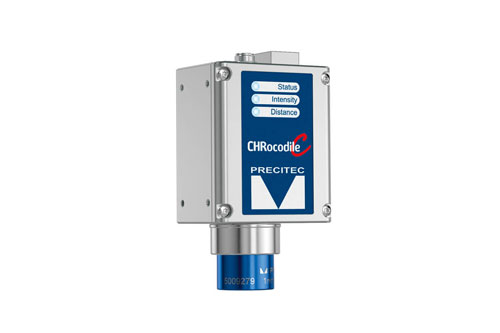
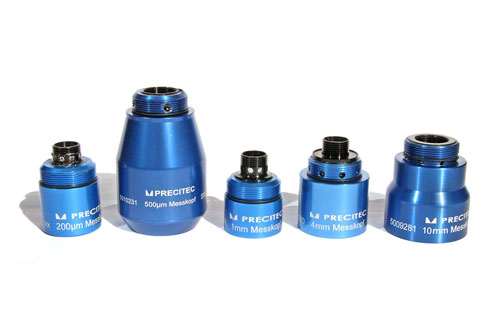


CHRocodile C
- Technical data
- Measurements/second: up to 4,000 Hz
- Measuring range: 200 µm ÂÂ- 10 mm, depends on selected optical probe
- Synchronization with external devices: trigger input, synchronizing output, via extension box: 3 encoder inputs
Compact design and optimal price-performance ratio
The ultra-compact CHRocodile C is the ideal device for high-precision distance and thickness measurements. The combination of optoelectronic and optical probe in a single housing not only saves space but also offers great value for money. CHRocodile C is the alternative to classical laser triangulation sensors.
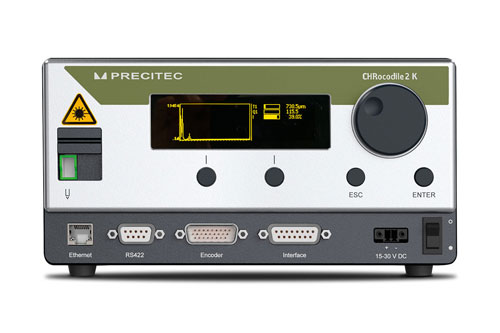
CHRocodile 2 K
- Technical data
- Measurements/second: up to 4,000 Hz
- Interferometric measuring range: 15 µm - 1500 µm
- Resolution: 3 x 10⁻⁶ x upper measuring range limit
- Synchronization with external devices: trigger input, synchronization output, 5 encoder input
Robust, one-sided, non-contact measurement of plastic wall thickness
The CHRocodile 2 K optical sensor uses infrared light to carry out highly precise, non-contact measurements of the wall thickness of non-transparent or opaque plastics.
Line Sensors
- The CHRocodile CLS line scan sensor is the ideal tool for precise 3D inline inspection in industrial manufacturing applications. The sensor delivers ultra-precise distance and layer thickness data of the sample along a line. The 3D structure of your sample is determined in a very short time through fast line scanning. The line sensor’s chromatic confocal measurement technology supplies data of extremely high lateral and axial resolution, enables measurement of any kind of material, and functions without shadowing effects – even for complex geometries. Typical applications for this line scan sensor include measuring displays or determining the topography of semiconductor chips.
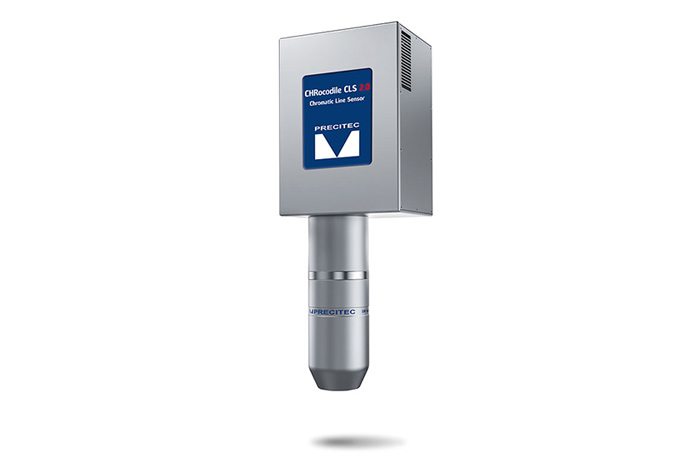
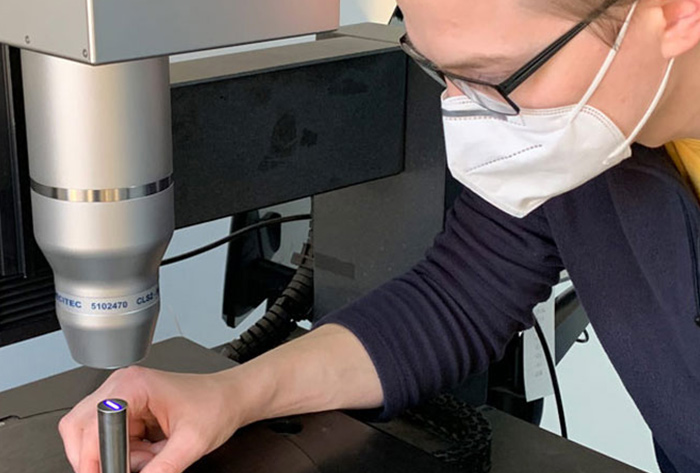


CHRocodile CLS 2 high speed 3D confocal line sensor
- Technical data
- Measuring rate: Up to 36,000 lines per second Measuring range: 680 – 10,600 µm*
- Lateral resolution: 1 - 8.5 µm*
- Synchronization with external devices: Trigger input, synchronizing output, five encoder inputs, DLL with example code
3D Confocal line sensor for high-speed inspection in smart factories
The CHRocodile CLS 2.0 enables you to measure complex surfaces with high slopes at very high speed and without shadowing. The high-speed confocal line sensor measures with utmost precision and high resolution on almost all materials, even difficult ones. Its versatility enables a wide variety of measuring tasks.
What's more, the CHRocodile CLS 2.0 helps to reduce operational costs, saves time, and ensures 100% control in industry 4.0 applications. Last but not least, the high-speed confocal line sensor CHRocodile CLS 2.0 is much smaller and lighter than alternative devices.
Applications for CHRocodile CLS 2.0 in the area of semiconductors: Wire bonding inspection, bump measurements, packaging wafer edge inspection, dicing groove inspection, defects, die cracks and photomask lithography.
More applications for Consumer electronics: Housing topography inspection, inspection of slightly, medium and highly curved surfaces, chamfer and spline inspection, diameter/hole/stepped surface inspection, cosmetic inspection with additional height data.
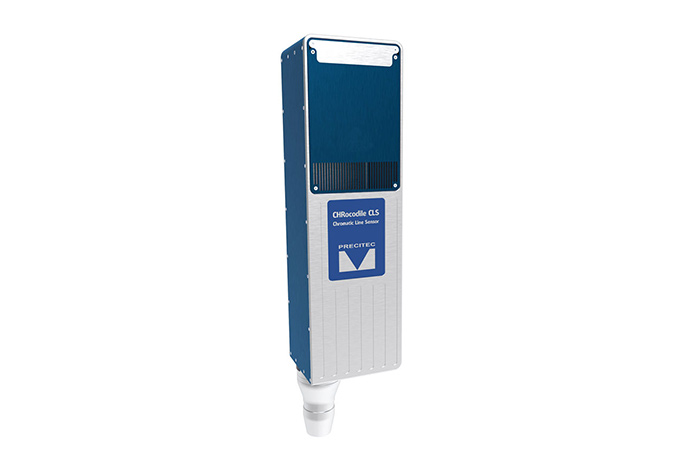
CHRocodile CLS | CLS HS
- Technical data
- Measuring rate (lines per second): up to 2,000 for CHRocodile CLS; up to 6,000 for CHRocodile CLS HS
- Line length: 0.96 mm - 4.78 mm, depends on selected optical probe
- Measuring range: 200 µm - 3,900 µm, depends on selected optical probe
- Lateral resolution: 1 µm - 5 µm, depends on selected optical probe
- Synchronization with external devices: trigger input, synchronizing output, 5 encoders inputs
Multipoint Sensors
- Our multipoint sensors use chromatic confocal measurement technology to simultaneously measure layer thicknesses or distances in multiple positions. Multipoint sensors are thus well suited to measuring large-scale objects such as automotive windshields in automotive industry or flat glass. The simultaneous deployment of up to 96 individual optical probes enables a very flexible application for various geometries and makes for shorter measurement times than conventional single-point sensors.
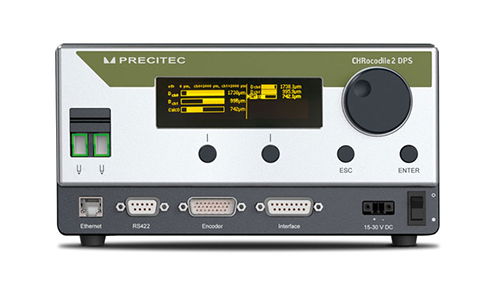
CHRocodile 2 DPS
- Technical data
- Measurements/second: up to 10 kHz per channel
- Chromatic measuring range: depends on selected optical probe
- Resolution: 3 x 10⁻⁶ x upper measuring range limit; higher resolution upon request
- Synchronization with external devices: trigger input, synchronizing output, 5 encoder inputs
2-in-1 solution for layer thickness and step height measurement
The CHRocodile 2 DPS is the ideal fit for two-sided thickness measurement of non-transparent materials or thick transparent layers that can not be measured by a single probe.
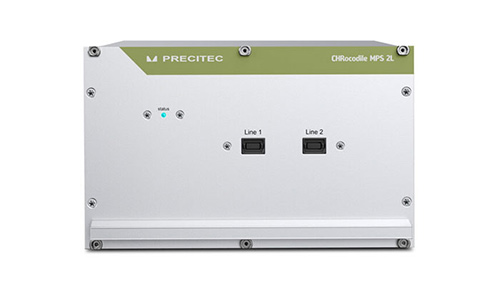
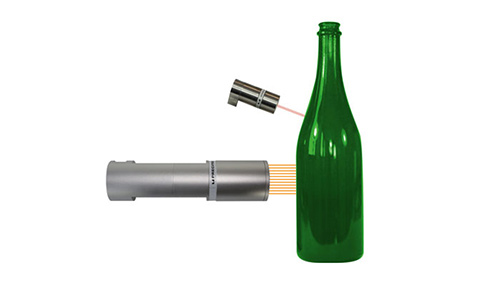


CHRocodile MPS 2L
- Technical data
- Number of measuring channels: up to 24
- Measurements/second: 4,500 (24 channels); 9,000 (10 channels)
- Measuring range: depends on optical probe
- Any combination of point and line probes
- Synchronization with external devices: trigger input, synchronizing output, 5 encoder inputs
State-of-the-art container glass wall thickness measurement
The new-generation CHRocodile MPS 2L multi-point sensor replaces up to 24 individual sensors in measuring layer thickness and distance along a line. It is ideal for measuring the wall thickness of colored and dark container glass. By enabling any combination of point and line measuring probes in a small footprint, this highly flexible device is ideal for inline inspections of container glass at the hot and cold end.
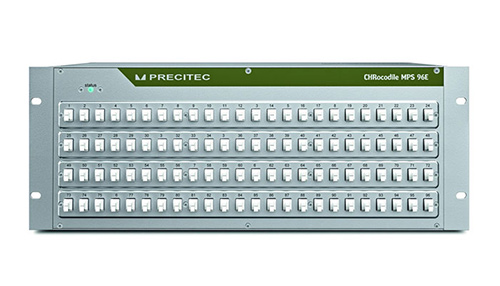
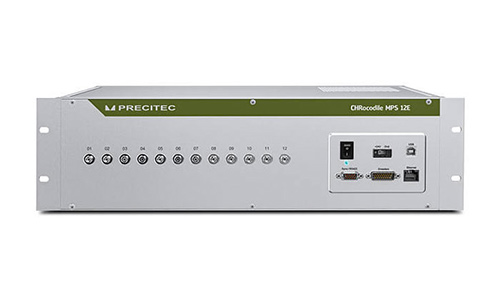


CHRocodile MPS sensor family
- Technical data
- Number of channels: 12, 24 or 96.
- Measurements/second: 8000 (12 channels), 4000 (48 channels), 2000 (96 channels)
- Compact probe for MPS96: 8 mm diameter, 10 mm measuring range, 20 mm working distance
- Synchronization with external devices: Trigger input, synchronizing output, 5 Encoder inputs
Fast inspection of large-scale objects
The CHRocodile MPS multi-point sensor series allows for fast inspections of large-scale applications and precise control of the thickness, topography and 3D shape of glass, for example. Thanks to the non-contact measurement technology the probes are not impacted by wear or tear and surfaces remain untouched.
Area Scan Sensor
- Precitec’s area scan sensor combines the advantages of an ultra-precise interferometric point sensor with flexible 2D scanner optics. Selective scanning of your sample with custom-designed scanning patterns ensures that only the relevant areas of the sample are measured. This saves you time in inline or offline quality controls. Typical applications for this area scan sensor include quality control in smartphone production, for measuring of camera module step height or lens tilt measurement in a smartphone camera objective. Further applications of the Area Scan Sensor are quality control in display production or measuring electronic components in semiconductor industry.
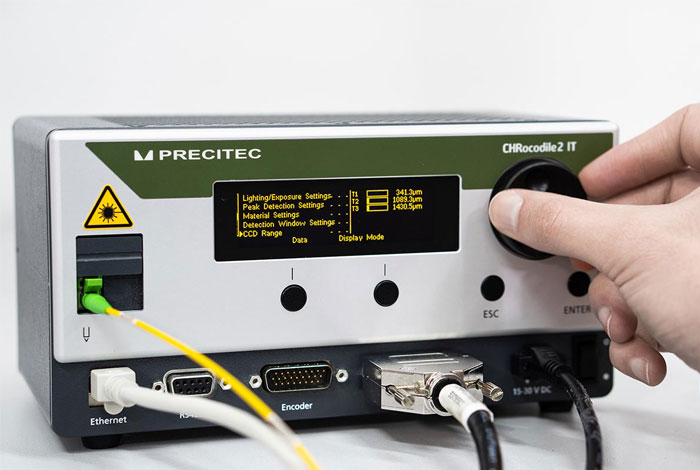
CHRocodile 2 IT
- Technical data
- Measurements/second:
CHRocodile 2 IT-family: up to 70,000 Hz
CHRocodile 2 IT DW: up to 70,000 Hz
CHRocodile 2 IT HTW: up to 4,000 Hz - Interferometric measuring range in air:
CHRocodile IT-family: 38 µm - 12600 µm CHRocodile IT DW: 15 µm - 7600 µm
CHRocodile 2 IT HTW: 4 µm - 300 µm - Resolution: 3 x 10⁻⁶ x upper measuring range limit
- Synchronization with external devices: trigger input, synchronization output, 5 encoder input
High-speed interferometric thickness measurement of all infrared-transparent materials
The CHRocodile 2 IT interferometric sensor enables ultra-fast and highly precise measurements of all infrared-transparent industrial materials. - Measurements/second:
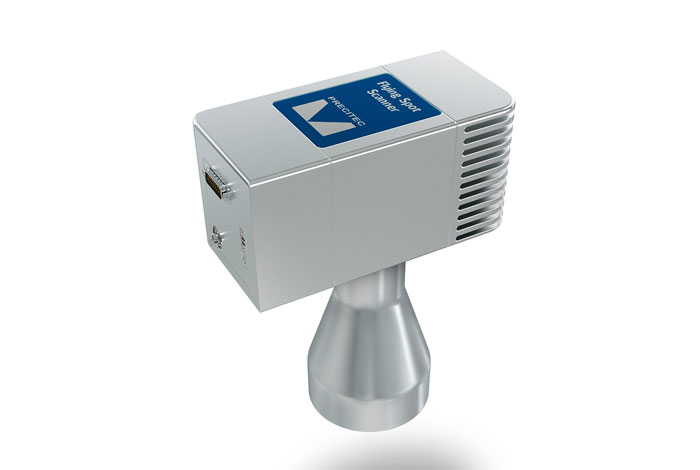
Flying Spot Scanner
- Technical data
- Measurements/second: up to 70 kHz
- Measuring range: depends on selected CHRocodile 2 IT sensor
- Flying Spot Scanner 80 mm
Scan area: 80 mm
Working distance: 200 mm
Max. speed measuring spot: 10 m/s - Flying Spot Scanner 40 mm
Scan area: 40 mm
Working distance: 125 mm
Max. speed measuring spot: 5 m/s
Spot scan for thicknesses, topography and lateral/vertical alignment
Precitec's Flying Spot Scanner (FSS) enables high-speed OCT imaging for thickness and topography, and is combinable with various CHRocodile 2 IT sensors to create a smart inspection system. The FSS features pioneering one-of-its-kind technology enabling high-speed non-contact area inspection for inline and offline quality assurance and 3D measurement on a wide range of materials and surfaces.
Chromatic line scan camera
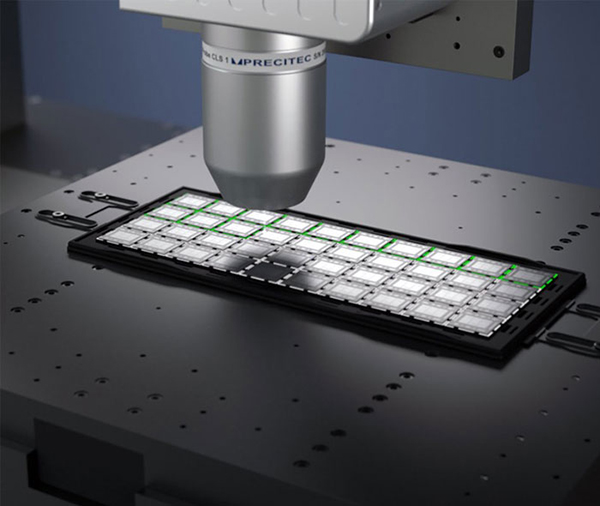
- As our line scan camera uses chromatic optics for 2D imaging, it differs from conventional microscope cameras by offering an extremely high depth of field while maintaining a high lateral resolution. Consequently, this 2D camera works without autofocusing, which saves valuable time during quality inspection. Typical applications include cosmetic inspection for example of smartphones, displays, or quality control of lenses and IOL´s.
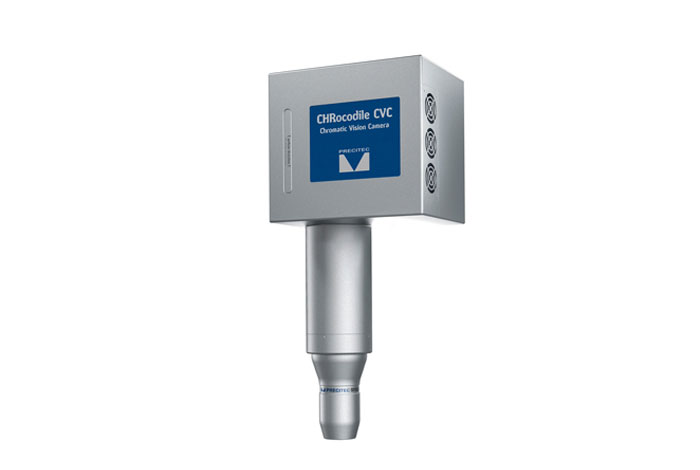
CHRocodile CVC
- Technical data
- Depth of field: 150 µm – 3,000 µm
- Pixel per second: up to 280 Mpixel
- Resolution: 2,048 pixel
- Line length: up to 10 mm
High-speed quality assurance through high-resolution 2D imaging
The CHRocodile CVC line scan camera uses chromatic optics for 2D imaging. The chromatic confocal technology enables both a significantly higher depth of field than microscope cameras and an extraordinary high lateral resolution. With no need for refocusing, this camera saves valuable time during quality inspections.
By ensuring high contrast on all kinds of materials, the CHRocodile CVC is ideal for inline or offline applications such as cosmetic inspection and positioning detection.
Medical EyeTracking
- Refractive laser-supported eye surgery is an indispensable means of treating vision defects like Hyperopia or Astigmatism. Despite all the advances in surgical techniques the involuntary and uncontrollable movements of a patient’s eye will never change. The laser has to follow these movements with minimal delay to be successful. In view of the increasing quality and customization demands from surgeons and patients, refractive eye surgery is more challenging than ever before. The active Eye Tracking from Precitec with precise tracking in up to 6 dimensions is the solution.
Precitec Medical EyeTracker
- Technical data
- High Speed: 2D tracking up to 1,350 Hz; 3D tracking up to 500 Hz; 6D tracking up to 250 Hz
- Ultra-low latency:
- Precision: robust algorithms with > 95% pupil and cyclotorsion recognition;
Eyetracking solutions for laser-assisted eye surgery
With quality and customization demands from surgeons and patients increasing, refractive eye surgery is more challenging than ever. But despite all the advances in surgical techniques, one factor never changes – involuntary and uncontrollable movement of the patient's eye. The Precitec Medical EyeTracker solves this problem by ensuring precise eye movement compensation during refractive surgery. An OEM version can be customized to suit a customer's specific requirements.
Optical Metrology Technology
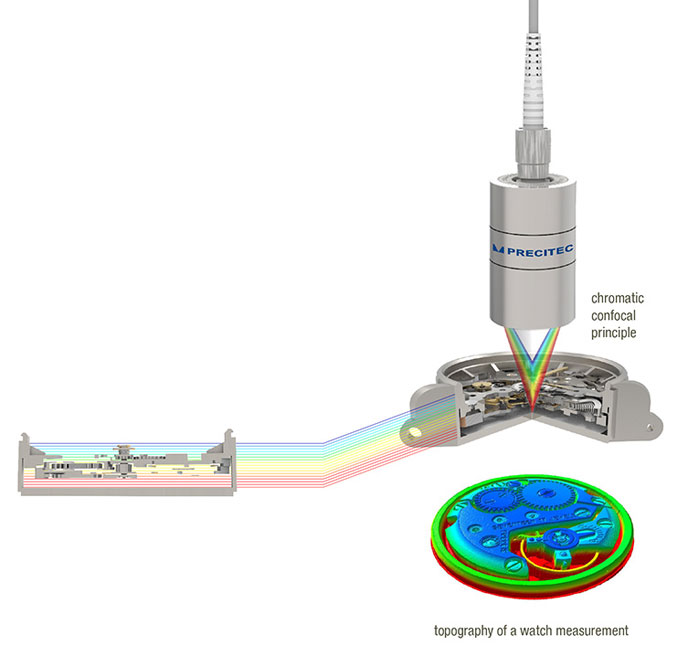
Chromatic confocal technology
- Ultra-fast distance measurements of almost all materials
How chromatic confocal sensor technology works
A polychromatic light source illuminates the surface of the object in question. This light is focused at different distances depending on the wavelength and only the light of a very narrow wavelength range is focused on the surface to be measured, with the remaining light concentrically distributed around this focus point onto a larger area. By determining the wavelength of the focused light, which is reflected back into the optical system, very precise distance measurements are possible at up to 70 kHz and in nanometer resolution. The distance is chromatically coded in the measuring range and the optical probe, which is connected to the sensor unit by an optical fiber, determines the measuring range or focal depth of the spectrum.
The high numerical aperture of the probes and the dynamic range of the sensor assure that nearly all materials can be measured. This measurement technology is much more reliable in all environments than common laser-based triangulation methods.
Advantages of chromatic confocal sensors- High-speed inline inspections at up to 70 kHz
- Passive optical probe – compact and passive, no wear and tear
- Chromatic depth scanning with no moving parts
- Measurement possible on any kind of material – absorbent or colored, diffusive or reflective, rough or polished
- Shadowing effects avoided
- Very high slope acceptance and high numerical aperture: up to 45° on reflective surfaces and >80° on diffusive surfaces
- Extremely high Z-axis resolution and accuracy
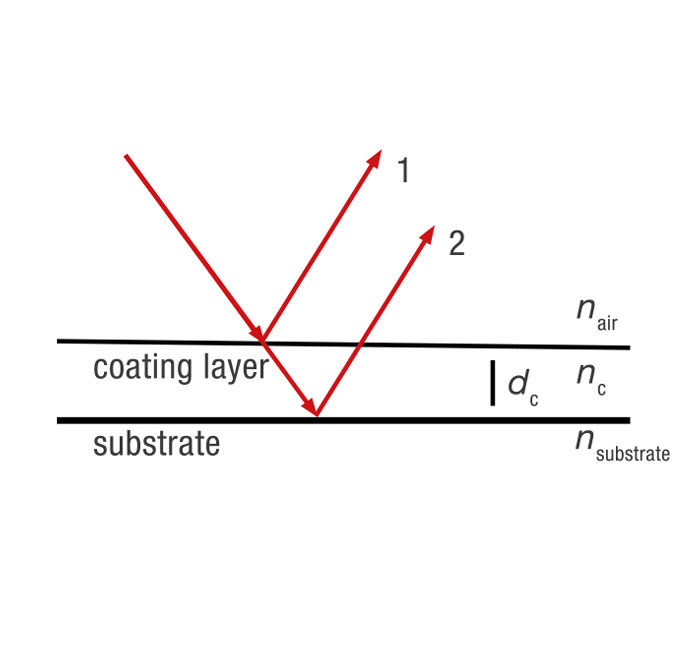
Interferometry
- Ultra-precise thickness and distance measurement
How interferometry works
Interferometers make use of the effects that occur when two or more beams of the same light source with slightly different path lengths are superimposed.
The resulting spectrum and its modulation frequency contain the distance or layer thickness data, depending on the measuring task the system is applied to.
Advantages of interferometric sensors- High-speed inline inspections at up to 70 kHz
- Insensitive to heat, humidity or vibration and thus suitable for harsh industrial environments, even in liquids such as water, oil or acids
- Suitable for quality assurance, surface and thickness measurement
- Unique optical technology capable of measuring multi-layer laminated glass
- Ultra-precise thickness measurements from 0.6 - 15,000 µm
- Thickness measurement of all infrared-transparent materials, e.g. in wafer inspection processes
- Static or moving measuring spot
- Passive optical probes – compact and passive, no wear and tear
Applications
- Our cutting-edge optical measuring technology is used in a wide range of industries for distance, thickness, and topography measurement applications, both inline and offline. In developing our products we always listen to what you, the customer, say you want. And then we work hand in hand with you to find the custom solution that meets your specific needs.
What’s more, we walk the talk. Our Applications Department is happy to conduct test measurements on our sensors so you can see for yourself how they perform. Moreover, our highly qualified sales staff will always be at hand to answer any questions you may have.
We hope the applications outlined on this website will inspire you to get in touch with us. The list of applications is far from complete and we are always ready and willing to take up new challenges. So why not test us out? Tell us your needs and we will come up with a suitable solution. 
Smartphone Inspection
- High-speed non-contact smartphone inspection
Optical 3D metrology for consumer electronics
Today's smartphones are high-precision devices made of many different materials. Inspecting the quality of their assembly is therefore of utmost importance. As smartphones are mass-produced, measurements have to be carried out at high speed.
Precitec’s non-contact optical sensors have the great advantage of not touching delicate components during inspection. Curved smartphone displays, phone housing, camera modules with precisely aligned components or battery cells with coated metal foils: whatever the application, Precitec has the ideal solution for accurate height and thickness measurements.
Display Inspection
- Precise non-contact inspection in display manufacturing
Optical 3D metrology for consumer electronics
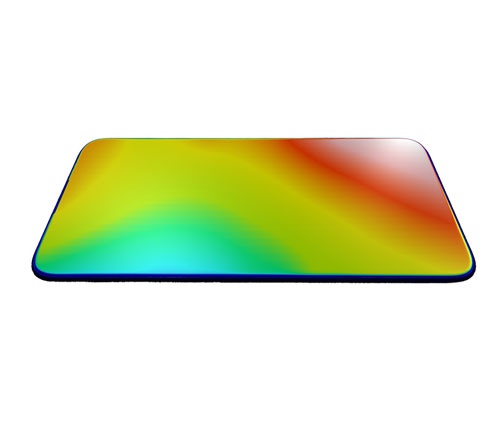
The coated and extremely hardened screen glass in smartphones or tablets has to be manufactured to the highest highest quality standards. Any scratches or cracks must be detected before installation and the flatness of the display glass measured with pinpoint accuracy.
Precitec has exactly the right non-contact optical metrology required to carry out these challenging tasks at high speed and with utmost precision.
Wafer Inspection
- Inline quality control of wafers in the semiconductor industry
CHRocodile sensors for wafer metrology
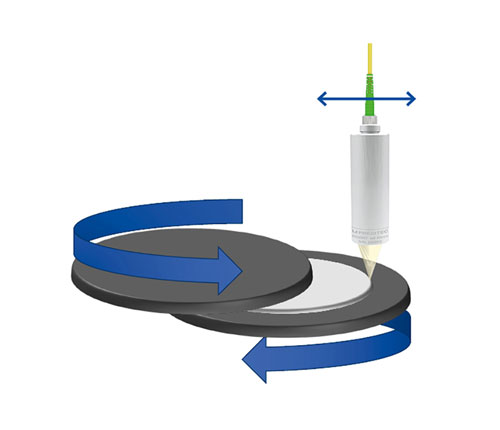
Semiconductor and microelectronic inspection sensors need to measure the gauge of wafers, determine structures in screen manufacturing, and check bonding during inline quality controls. Moreover, they also have to measure transparent coatings, and monitor mechanical and chemical removal processes in real time for quality control purposes.
With their lateral resolution in the micrometer range and high resolution in the sub-micrometer range, our CHRocodile sensors fulfill all these requirements and deliver reliable measurements in both harsh industrial and clean room environments.
Glass
- Inline wall thickness measurement of glass
CHRocodile sensor family
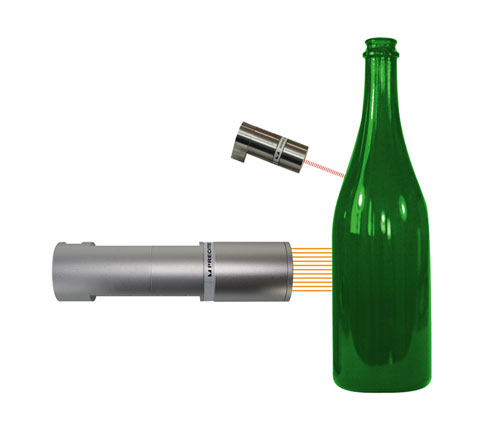
CHRocodile sensors measure the thickness and topography of glass of any color or surface structure in multifaceted application areas. These sensors have become the industry standard in wall thickness measurement of glass containers in inspection machines, as well as gauge measurement of display glass and pipe glass.
Circular deviations of bottles, the wall strength of hot quartz pipes, or function foil in pre-fabricated sandwiched layers, can be easily determined. And even at glass temperatures of 1,700 °C the sensor does not get too hot.
Ophthalmology
- Precise high-speed eye movement compensation for refractive surgery
Precitec EyeTracker
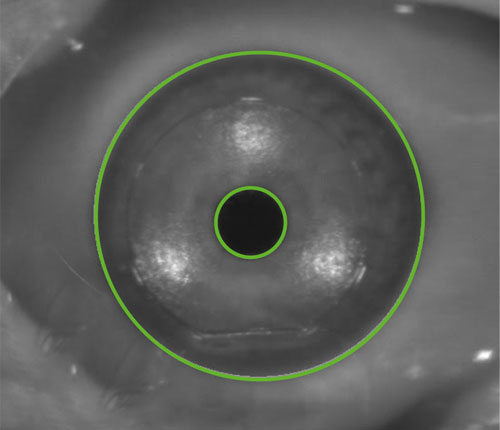
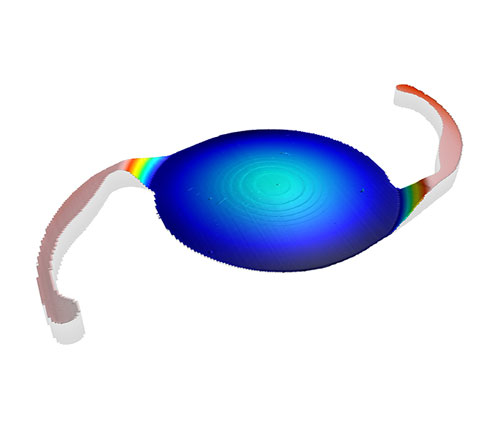
Refractive laser-supported eye surgery is an indispensable means of treating vision defects like Hyperopia, Myopia, Astigmatism, Cataract, and Glaucoma. Yet despite all the advances in surgical techniques, one factor will never change – the involuntary and uncontrollable movements of a patient’s eye. The laser has to follow these movements with minimal delay for refractive surgery to be successful.
In view of the increasing quality and customization demands from surgeons and patients alike, refractive eye surgery is more challenging than ever before. Active eye tracking from Precitec is the solution in this respect.
Quality Assurance Medical Technology
- Quality assurance in medical components
CHRocodile optical sensors
The exact wall strength of medical balloons is critical for the success of therapy. The highest possible precision is vital when processing spectacle glass and contact lenses. Precisely compensating for eye movement is vital during refractive eye surgery. These three examples show how important quality control and precise tracking are found in medical technology applications.
Precitec CHRocodile optical sensors deliver high-precision non-contact distance and layer thickness measurements of medical components. With highest precision, they measure the thickness of glass, the anti-scratch coating on glass, blisters, molds and lenses, as well as artificial joints and stents.
Precitec EyeTracker provides the prerequisite for successful refractive eye surgery with fast eye tracking in up to six dimensions. All Precitec EyeTracker are certified according to ISO 13485 / ISO 9001, and thus meet the strict quality requirements of the medical industry.
Automotive Glass
- Precise measurement of automotive glass
CHRocodile sensor family
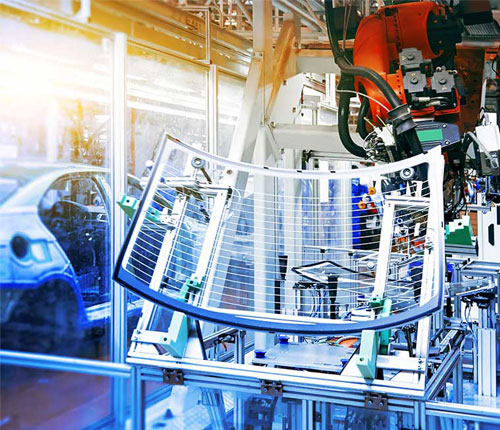
In recent years, the automotive glass industry has been confronted with new challenges for windshield inspection as their shapes and technical features have become more and more complex. Since the shape and thickness of these laminated glasses have to be determined in short cycle times, traditional measurement tools such as tactile gauges are no longer suitable.
Non-contact optical measuring technology from Precitec answers these new demands for quality control.
Plastics
- Fast inline inspection of plastic bottles, foil, and blown film
CHRocodile 2 IT | CHRocodile 2 K
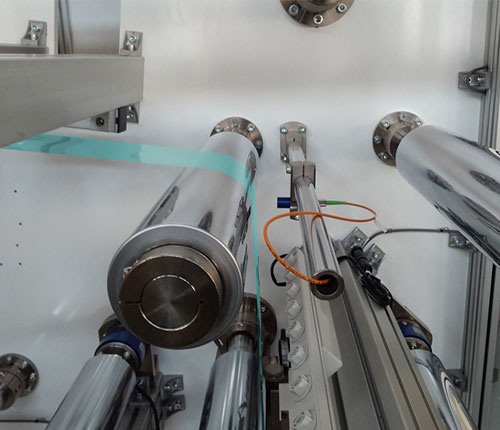
Precise measurement of the topography of PET bottles, plastic foil, and blown film is key to detecting any undesired deviations from the high product standards required. The high measuring speed of these Precitec sensors enables fast, non-contact inline inspection.
3D Industry Solutions
- To stay competitive, today’s manufacturing industry needs state-of-the-art solutions in high-end industrial measurement technology. The demands of industry 4.0 make such solutions more important than ever. High-speed manufacturing processes require automated measuring and quality control systems, as well as smart sensor-based status and process monitoring technology.
Industrial 3D metrology from Precitec enables ultra-fast inline measuring, inspection, and process control in various areas of industry, e.g. Consumer Goods, Semiconductor Industry, Glass Industry, Medical technology, Coordinate Metrology, Automotive and Plastics. The technology required has to be contact-free, precise but robust, function error-free, and deliver high-resolution 3D imaging. The industrial metrology solutions we offer fulfill all these requirements. 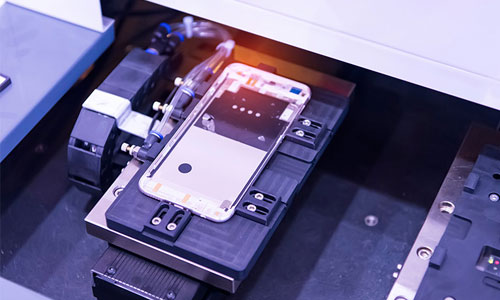
Consumer Electronics
- Quality inspection with utmost precision
Utmost precision is required in manufacturing consumer electronics products, such as mobile phones, tablets and displays. The interplay of a wide variety of materials and the complex geometries of these products are the key quality assurance challenges. 3D metrology helps the consumer electronics industry to master these challenges.
By using our non-contact optical sensors you can measure the gap between the glass and housing of a smartphone and the flatness of display glass and inspect step heights, edges and PCB coatings to within a few µm.
As Precitec’s CHRocodile CLS chromatic confocal line sensor scans with up to 192 simultaneous measuring points, it covers much larger surfaces than a conventional point sensor in the same time. The CHRocodile 2 IT series carries out thickness measurements of layers as thin as 0.6 µm at a measuring rate of up to 70 kHz. By combining the IT series with Precitec’s Flying Spot Scanner, you can measure the distinct profiles of relevant components along predefined scan paths in a significantly shorter overall time.
For mass production lines in the consumer electronics industry, it is not just high precision and speed that are required of optical sensors but also the ability to measure inline. That is why the CHRocodile CLS is the ideal solution for manufacturers of electronic components – and it additionally gives them a huge productivity advantage.
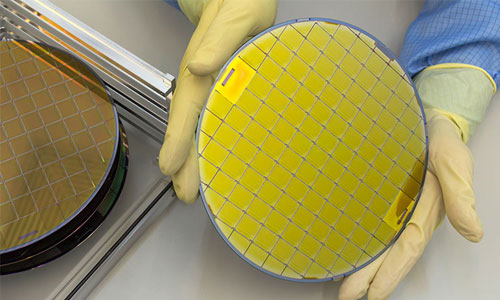
Semiconductor Industry
- State-of-the-art wafer inspection
Our non-destructive optical measurement technology offers ultra-precise measurement and analysis of semiconductor chips (wafers). The high-resolution 3D data these semiconductor sensors collect allows the topography of the circuits to be examined in the necessary detail.
Our CHRomatic confocal line sensor CHRocodile CLS measure up to 192 measuring points in close proximity so that the optical probe covers a much larger area in a given time than a conventional point sensor.
Our CHRocodile 2 IT series carries out thickness measurements of wafers, glues, and coatings at high speed to enable higher semiconductor throughput coupled with more accurate and repeatable product quality.
These reliable high-speed tools measure endpoint thicknesses in situ during workplace treatment in CMP, back grinding, and spin etching. In the final analysis, optical monitoring makes semiconductor production processes more efficient, which reduces material waste.
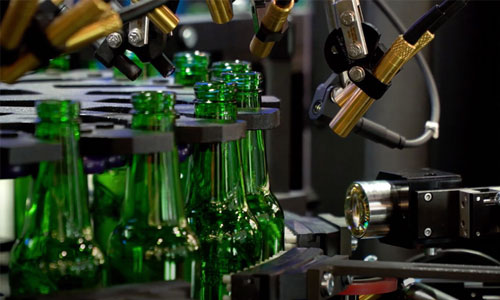
Glass Industry
- High-speed glass thickness measurement
How do you measure the wall thickness of glass containers in inspection machines? Our state-of-the-art contact-free sensor systems can measure the thickness and topography of glass of any color or surface. Even the circular deviations of bottles or the wall thickness of hot quartz pipes or PVB foils in pre-fabricated multi layers, e.g. HUD windshield films, can be measured.
What’s more, these contact-free sensors do not heat up – even at glass temperatures of 1,700 °C. Moreover, contact-free glass thickness measurement offers the great advantage of an ultra-high-speed process, which brings vital productivity gains.
Our CHRocodile MPS 2L sensor, the glass industry-standard for stop-and-rotate-machines, delivers 4,000 measurements per second in different positions through its integrated optical probes.
Our CHRocodile 2 IT series can measure distances and thickness of 0.6-15,000 µm with measuring rates of up to 70 kHz. And with a spot size of only a few hundredths of a millimeter even the tiniest fault in the glass can be identified.
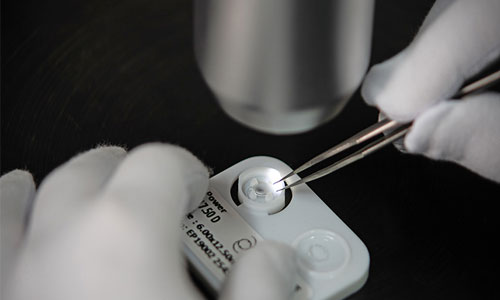
Medical Technology
- Precitec EyeTracker - the eyes of medical metrology
With human lives at stake, quality inspection plays a vital role in the manufacturing of medical technology equipment. Our CHRocodile 2 IT enables ultra-precise and fast inline measurement of intraocular lenses (IOLs), syringes, plastic tubes, medical solution bags, stents and much more.
The high measurement speed is a particular advantage for such mass-produced medical supplies.
Moreover, the Precitec EyeTracker has set new standards in Ophthalmology – refractive laser surgery through high-speed eye tracking in up to six dimensions and precise eye movement compensation. By following all the involuntary and uncontrollable movements of a patient’s eye the Precitec EyeTracker makes a critical contribution to precise, safe and customized laser surgery. Every Precitec EyeTracker complies with the medical industry's high quality requirements, e.g. through ISO 13485 / ISO 9001 certification.
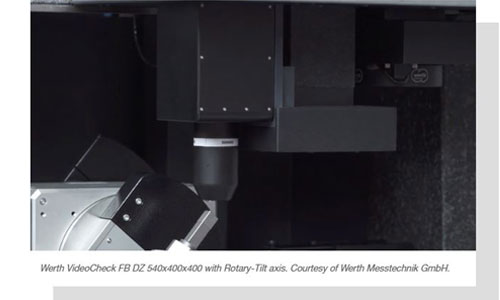
Coordinate Metrology
- Fast and precise
Well-known manufacturers of coordinate measuring machines use our CHRocodile CLS sensors as supplements to tactile probes. This combination of two measuring principles enables the user to meet the specifications of each measuring task correctly.
The high measuring speed of our optical sensors substantially reduces the time required to measure surface topography with high precision, e.g. strongly slanted, polished, or reflecting objects.
In addition to our well-engineered coordinate measuring technology, we offer outstanding, high-precision sensor technologies. These are essential components of topographic 3D systems for measuring layer thickness and roughness of a great variety of surfaces.
Automotive
- Moving with trends in automotive glass
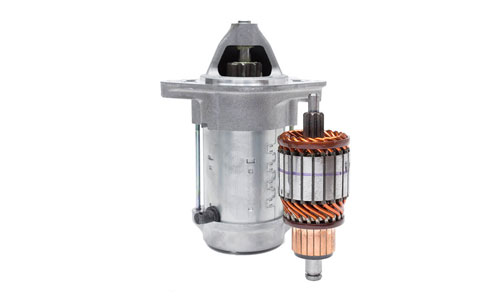
The automotive industry is passing through disruptive times, with e-mobility being just one of the trendsetting catchwords. At Precitec we have the state-of-the-art optical technologies that the automotive industry needs to stay one step ahead of such disruptive changes. The applications for which our non-contact optical technologies offer solutions for automotive metrology.
They include automated inline inspection of automotive glass (e.g. windscreens) through high-speed measurements of glass thickness, shape and topography, roughness measurements of cylinders or conformal coatings and – specifically for electric-powered vehicles – thickness measurements of the insulation layer on copper hairpins.
Precitec products, e.g. CHRocodile CLS, CHRocodile 2 K or CHRocodile 2 LR enables automotive manufacturers to stay ahead of the field by measuring more precisely with light.
Plastics
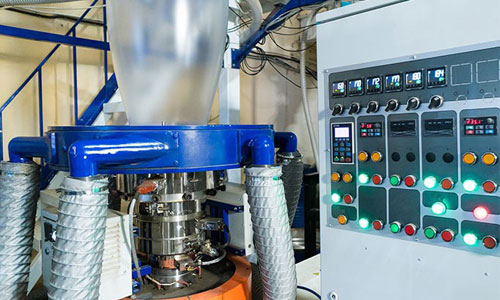
- Wall thickness measurement of blown film production
Film thickness measurement in the plastics industry Our dedicated interferometric sensors of the CHRocodile 2 IT series and the CHRocodile 2 K measure the thickness and topography of various types of plastic films, containers and PET bottles. Such application flexibility is convenient, especially during film production, as different machine parameters can be instantly adjusted based on the sensor’s values. The infrared light source of the interferometric sensors enables the thickness of different kinds of even optically non-transparent or completely opaque plastics to be measured. What’s more, thin film is measured with the same precision as any thicker plastic material.
Laser Cutting
Efficient systems for your laser cutting machine
Automated cutting tasks with high quality
For all your laser cutting requirements and machine concepts, Precitec offers tailor-made total solutions and has gained worldwide recognition as the market leader in laser cutting.One like the other - reliable performance in 24/7 operation
Integrated, intelligent sensors help you to monitor and automate the cutting process. This allows you to make your production task more efficient, transparent, and economical. The process is permanently stable and precise. Optimized cutting qualities are achieved, and production rejects are avoided.Market leader in the field of laser cutting
- 32 Generations of cutting heads since 1994
- 130 Millimeter thick steel cuts through our cutting heads
- 800 Installed complete solutions consisting of laser, beam guidance, and cutting head
- > 35000 Cutting heads in industrial use worldwide
We can do more than just first-class products
We develop individual solutions and see ourselves as your partner over the entire product life cycle.
Our comprehensive service package - consulting & support.- Project planning, tests, and preliminary trials
- Commissioning, training, and maintenance
- Spare parts, service, and repair
Automated solutions for 2D and 3D laser cutting

Tailor-made solutions for your application
Precitec offers suitable solutions for all your requirements and machine concepts. 2D laser cutting is the most common application. Flat materials of various thicknesses made of steel, stainless steel, aluminium, or non-ferrous metals are processed with great dynamics and high cutting speed. 3D laser cutting systems are widely used, especially in the automotive industry.
Various intelligent sensor solutions help to ensure that the laser cutting process is permanently stable and precise, to obtain optimized cut qualities and to avoid production rejects.
We also offer you complete optical solutions for 2D laser cutting from 1 to 20 kW. We rely on fiber laser and disk laser technology. You receive everything directly from one source: from the laser source to the fiber optic cable to the cutting head.Laser Cutting Heads
Automated 2D and 3D laser cutting
Tailor-made solutions for your application
Precitec offers customized solutions for all your laser cutting requirements and machine concepts. 2D laser cutting is the most common application. Flat materials of various thicknesses made of steel, stainless steel, aluminium, or non-ferrous metals are processed with great dynamics and high cutting speed. 3D laser cutting systems are widely used in the automotive industry, especially for agile robot applications. Various intelligent sensor solutions help to ensure that the laser cutting process is permanently stable and precise, to obtain optimized cut qualities and to avoid production rejects.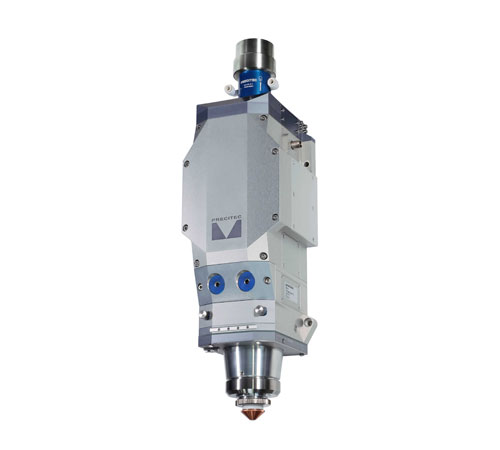
ProCutter Zoom 2.0
- Technical data
- max. laser power: 12 kW (with wave lengths of 1030 - 1090 nm)
- Magnification ratio: 1.2 / 1.5 / 2.0 / 2.5 / 3.0 / 3.5 / 4.0
- NAmax: 0.13
- Dimension (WxD): 126 x 133 mm
- Weight: 7.6 kg
Wide range of cutting applications
The cutting head ProCutter Zoom 2.0 provides a maximum and flexible performance in a minimum of space. It generates the perfect beam for all materials in all thicknesses for laser powers up to 12 kW and is therefore the ultimate all-rounder for your flatbed system.
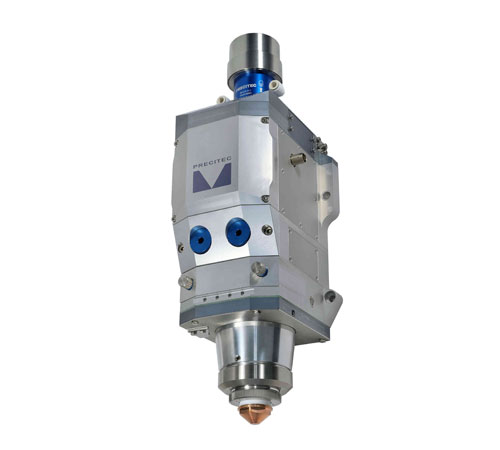
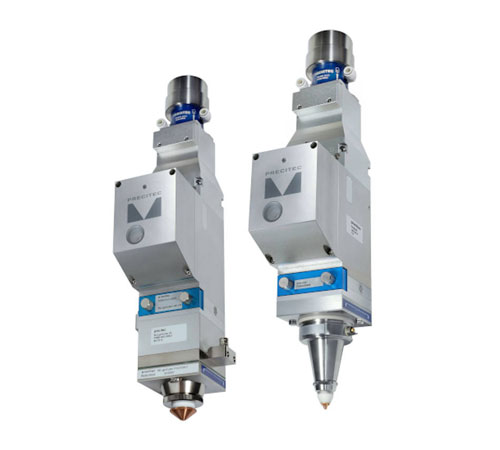
ProCutter 2.0
- Technical data
- max. laser power: 30 kW (with wave lengths of 1030 - 1090 nm)
- Collimating focal length: 100 mm, Focus lengths: 150, 200 mm
- NAmax: 0.13
- Dimension (WxD): 96 x 134 mm
- Weight: 4.9 kg (FF150)
Efficient - automated - persistent
1000-times reliability in use: the ProCutter 2.0 impresses worldwide with its high performance and automation. Its reliability and load capacity in flatbed and tube cutting systems has been perfected - up to a maximum laser power of 30 kW.
LightCutter 2.0
- Technical data
- Max. laser power: 6 kW (2D version only)
- Collimating focal length: 100 mm, Focus lengths: 125, 150, 200 mm
- Dimensions (WXD): 130 x 69 mm
- Weight: 4.0 kg
Flexible use for 2D to 3D applications
The LightCutter 2.0 is the ideal solution for all laser cutting applications in the medium power range up to 6 kW. Whether 2D, 2.5D or 3D - thanks to its wide range of variants you will always find the most efficient and economical configuration. It is characterized by high cutting qualities for all metals up to 25 mm sheet thickness - especially for laser cutting of mild steel, stainless steel, and aluminum.
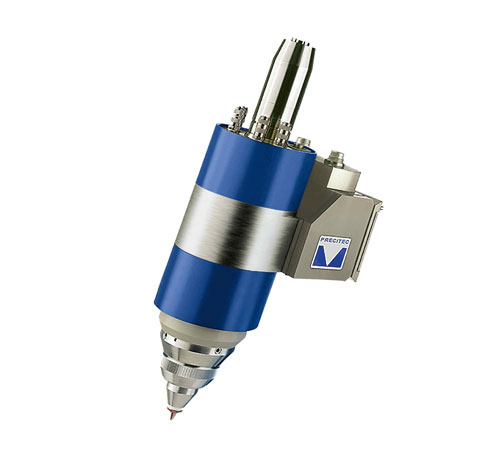
SolidCutter
- Technical data
- max. laser power: 4 kW (wavelengths 1030 – 1090 mm)
- Collimation focal lengths: 75, 100 mm, Focus lengths: 75, 100, 125 mm
- Dimensions 163 x 132 mm
- NAmax: 0.16 at FC75, NAmax: 0.12 at FC100
- Stroke: ± 15 mm
- Weight: 5.0 kg
Stable and user-friendly for automated laser systems
The SolidCutter enables the machining of spatial geometries with highest accuracy. It convinces in the 3D machining of complex individual contours on metallic materials.
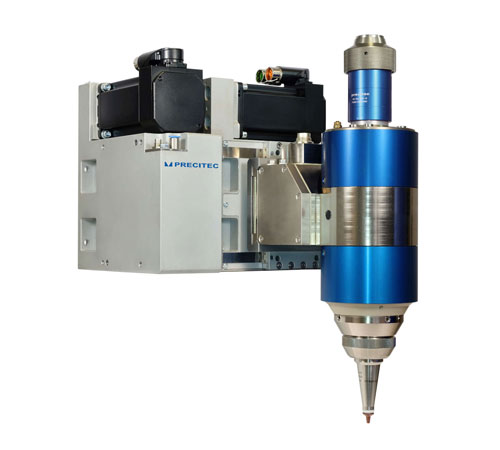
FormCutter Plus
- Technical data
- Working area: 50 x 50 mm
- Collimating focal length: 75, 100 mm, Focus lengths: 75, 100, 150 mm
- Axial length: 560 mm (FF100)
- Dimensions: 245 x 265 mm
- Offline programming of the cutting contour by CAD CAM
Complex 3D cuts in series production
The FormCutter Plus enables cut-outs of complex workpiece geometries with the highest precision. Especially for agile robot applications in the automotive industry, it convinces with best cutting quality.
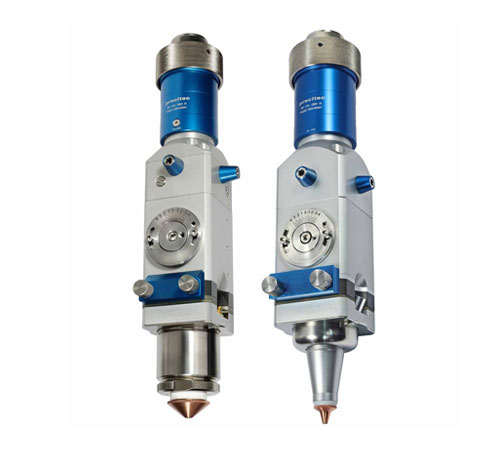
MiniCutter
- Technical data
- max. laser power: 2 kW (for wavelengths of 1030-1090 nm)
- Collimating focal length: 75 mm, Focus lenghts: 75, 100, 125, 150 mm
- NAmax: 0.13 at FC75
- Dimensions: 50 x 50 x 258 mm (FF 75)
- Weigths: 1.4 kg Vertical adjustment range of focal position: ±4 mm
Efficient 2D and 3D applications up to 2 kW
The MiniCutter is a real all-round talent for thin sheets. As a simple and compact plug and play solution, it provides you with very good cutting qualities on the one hand - but it is also unbeatable in price. You can efficiently and cost-effectively process sheet thicknesses of up to 10 mm with solid-state lasers.
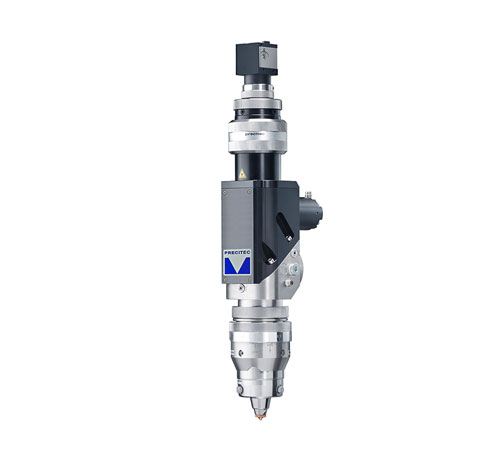
FineCutter
- Technical data
- max. laser power: 500 W
- Wave lengths: 1,064 nm
- Focal lengths: 50, 80, 125 mm
- max. free aperture: 16 mm
- Vertical adjustment: +0.5 / -2.5 mm
Versatile solutions for thin sheets & complex 3D components
The FineCutter offers you a versatile solution for the wide range of applications (e.g.: Micromachining) of laser cutting in precision machining. It is specially designed for the use of solid-state lasers with highly brilliant and pulsed beam sources. This enables you to achieve the finest contours and smooth, burr-free cut surfaces, both in 2D laser cutting systems and in robot applications. Thanks to the integrated camera, setup is completed in the shortest possible time and you always have a good view of the cutting process.
Laser
Laser technology as a complete solution
Fiber and disk laser technology - everything from one source
Precitec offers you complete optical solutions for 2D laser cutting from 1 to 20 kW. We rely on fiber laser and disk laser technology. You receive everything directly from one source: from the laser power source to the fiber optic cable to the cutting head. This means that you need only one provider for everything to do with the entire optical chain solution, as well as a fast response time worldwide with regard to commissioning and service.Our service for your productivity
Maintenance and care is simple and user-friendly thanks to the modular laser design. Thanks to remote access, up to 80 % can be solved economically without on-site use. If a service call should nevertheless be necessary, the internationally positioned service team and the availability of spare parts make it possible to react quickly and provide immediate service. We are positioned for you worldwide.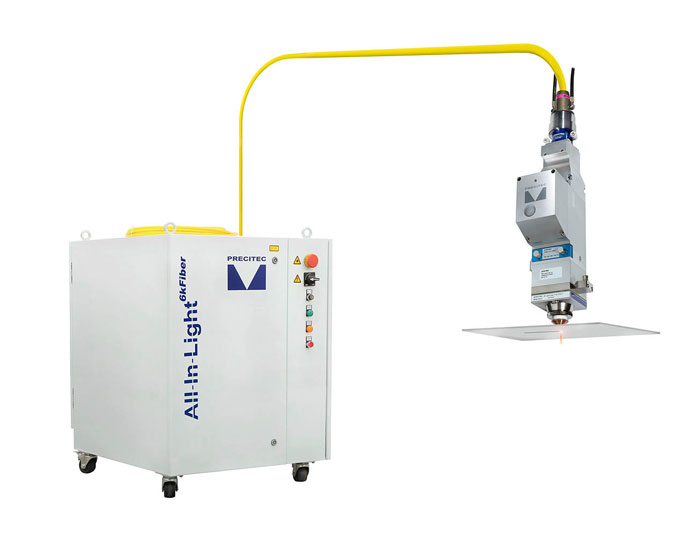
All-In-Light Fiber Laser
- Technical data
- Laser power at the workpiece: 2-20 kW
- Beam quality: 2.1 mm x mrad, 3.7 mm x mrad, 4.5 mm x mrad, 5.5 x mrad
- Min. diameter process fiber: 50 µm resp. 100 µm
- Length of laser light cable: 20 m
All-In-Light Fiber as a complete solution
The latest fiber laser series "All-In-Light Fiber" is a cost-efficient and reliable complete optical solution for your laser cutting system. You receive everything directly from a single source, from the laser source to the process fiber to the cutting head. Precitec is your contact for all questions regarding the entire optical path. Thus, reaction time will be reduced. The commissioning of your cutting machine will be speed up. Service and application cases will be handled immediately.
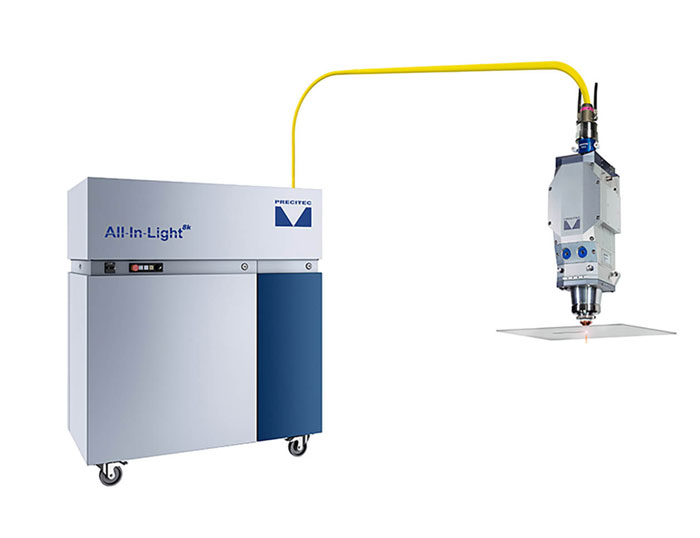
All-In-Light disk laser
- Technical data
- Laser power at the workpiece: 1-12 kW
- Beam quality: 2 mm x mrad resp. 4 mm x mrad
- Min. diameter process fiber: 50 µm resp. 100 µm
- Length of laser light cable: 10 - 50 m
- Ambient temperature: 10 - 50 °C
All-In-Light as a complete solution
With "All-In-Light" we offer you the best complete optical solution based on disk laser technology for your flatbed and tube cutting machine. Everything from a single source, from the laser, laser light cable to the cutting head, which has been proven and validated numerous times in industry. For you, this means having just one primary source for the entire optical path. With the All-In-Light solution the application complexity is significantly reduced enabling rapid commissioning and service response time.
Automation / Process Monitoring
Automation of your cutting processes
Integrated intelligent sensor technology with added value
Our intelligent sensor systems help you to monitor and automate the cutting process. This makes your production task more efficient, transparent, and economical. Various solutions help to ensure that the laser cutting process is permanently stable and precise, to obtain optimized cut qualities and to avoid production rejects.
Industry 4.0 and KI
-
Parallel to the rapidly advancing networking, Precitec is utilizing various development approaches in the field of industrial digitalization. Driven by the joy of innovation, our intelligent cutting solutions help you to automate the cutting process and thus make your production task efficient, transparent and economical.
Clever solutions for networked production
Faster, easier, more enduring - that is the declared goal for the production of tomorrow. New automation solutions make it possible to network the individual production steps intelligently and profitably.
At the beginning of 2019, INCUBATOR was founded in Karlsruhe with precisely this claim. Since then, a young team has been working on concepts for the laser process of tomorrow. Modern IT technologies and methods such as Industrial Internet of Things (IIoT), Machine Learning (ML), Artificial Intelligence (AI) and Cloud Computing form one of the essential cornerstones. Based on artificial intelligence, our systems are continuously developed further and thus, the flood of data is reduced to the relevant level or maintenance intervals are specified in an optimized way.
Always informed, even wirelessly
Smart sensors integrated into the cutting head continuously monitor the status of critical components or cutting process parameters. Clear status signals and error messages are provided for further handling. So-called warning thresholds can also be individually defined and set, allowing adaptation to any system configuration and ensuring that the cutting process is reliably monitored.
Recorded information is easily and seamlessly integrated into existing data acquisition systems. In addition, it is possible to access the data via mobile devices and to have the current status of the cutting head visualized or to query error messages.
Trust is good, control is better
We test the reliable continuous operation of our new development approaches intensively in our own laser laboratories and cutting facilities. Due to the most modern equipment and very high laser power, we push the limits of the applications.
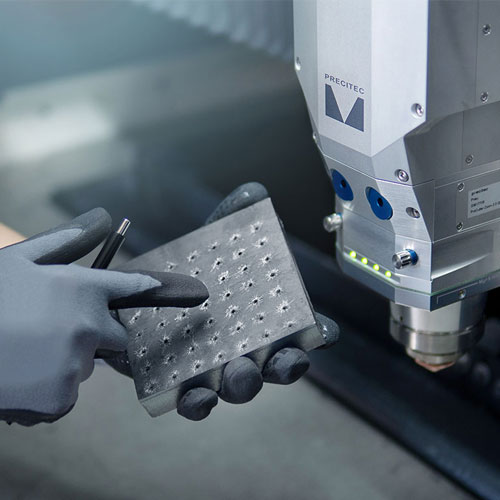
PierceTec – Piercing process during laser cutting
- Increase your productivity - robust and with high quality
PierceTec represents fast, clean and reproducible piercing during laser cutting. The technology doesn't just monitor the piercing process, it also controls it. The piercing time is shortened to a minimum. Only as much laser power is used as the process effectively requires. The result is impressive: the piercing holes are precisely and evenly formed. On the upper side of the sheet metal, significantly less material (ejection) is formed throughout. In this way, you achieve a constant hole and surface quality and can reduce the amount of rework required.
Reduction of time and machine downtime
PierceTec also reliably ensures increased process reliability during the cutting process: in real time, unintended cut breaks are detected and reported to the customer's control system without delay. In the event of inconsistent batch quality or material changes, direct intervention by the machine operator is therefore no longer necessary. Moreover, the PierceTec system protects the usual wear parts such as the protective glass on the process side and the cutting nozzle. The longer service life reduces follow-up costs and the occurrence of machine downtimes.
In summary: PierceTec saves cycle time and operating costs-and simultaneously increases the performance and quality of the piercing process.
Easy integration
PierceTec technology is compatible with all laser beam sources and can be used as a fully integrated sensor in the ProCutter 2.0 and ProCutter Zoom 2.0 cutting heads or as a sensor built into the laser source. Predefined programs can be selected, saving time during commissioning.

By far the best sensor
- Precise measurement and automated control
The company name Precitec stands for precision and technology. At the beginning of the 1990s, the company's success story began with the first CO2 cutting heads equipped with the innovative, fully automated, capacitive clearance control. The technology was continuously developed and is still the reference in the field of 2D and 3D laser cutting today. In combination with modern solid-state lasers, such as fiber lasers and disk lasers, it impresses with precision and long-term stability. A constant working distance is guaranteed throughout the entire application spectrum: from piercing and high-speed cutting of thin sheets to thick sheets cutting with very high laser power. Because only a constant distance between component and cutting head achieves optimum cutting qualities and highest cutting speeds. Even the smallest deviations lead to burr formation or have an unfavourable effect on the cutting speed, the roughness of the cut surfaces and the gap width.
Additional added value in the process ancillary times
In addition, the distance sensor technology impresses with valuable functions in process ancillary times. While the cutting head is positioned quickly, it acts as a collision sensor and avoids costly mechanical damage. In addition, in flatbed cutting applications, it can detect the edges of the metal sheet and ensure that the material is used particularly economically. The distance sensor technology also shows its strengths in laser cutting of tubes and profiles as well as in robot applications. Manual intervention or additional retraction for batch or profile changes is no longer necessary.
Applications

Wide range of variants in 2D and 3D laser cutting
Complex high-quality laser cuts
The laser is an universal tool and is used in modern industry to process various metals such as mild steel, stainless steel, or aluminum. Complex and filigree high-quality cutting contours can be produced without contact. This process offers a wide range of variations in laser cutting from flat sheets (2D laser cutting) to agile robot applications (3D laser cutting).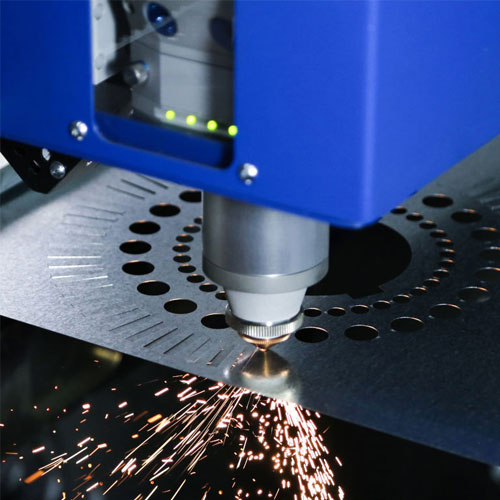
Flatbed Cutting 2D
- Efficient flatbed cutting for your laser cutting system
2D laser cutting enables a variety of tasks with high quality
Flatbed cutting, also known as 2D cutting, is the most common application in laser cutting. Fiber lasers have established themselves worldwide as the dominant laser beam source. 2D laser cutting systems process flat material of various thicknesses made of steel, stainless steel, aluminium, or non-ferrous metals with great accuracy and high cutting speed. Machines which are used for laser cutting are equipped with a total of three axes: two positioning axes for traversing the desired cutting contour and a Z-axis for adjusting the distance between the workpiece and the cutting head.
Precitec offers high-quality tailor-made solutions for all requirements and machine concepts in 2D laser cutting and has gained worldwide recognition as the market leader in cutting optics, distance sensor technology, and process monitoring.
Typical applications in 2D laser cutting
In 2D laser cutting of thin sheets, high cutting speeds of over 140 m/min and accelerations of up to 6 g are achieved. Precitec cutting heads set the industry standard and continue to convince by providing stable operation, leading to lower operating costs for a fast return on investment.
Fusion cutting of stainless steel and aluminium up to a thickness of 130 mm and flame cutting of mild steel up to 70 mm can be processed with laser powers of up to 20 kW. These sheet thicknesses were previously reserved for plasma or oxyfuel cutting. Precitec's laser cutting heads meet all the necessary requirements to this: from power stability, to the complete control of the adjustment range of the focus position and robust integrated process monitoring.
Pipe Cutting
- Laser cutting of tubes and profiles
Customized laser cuts
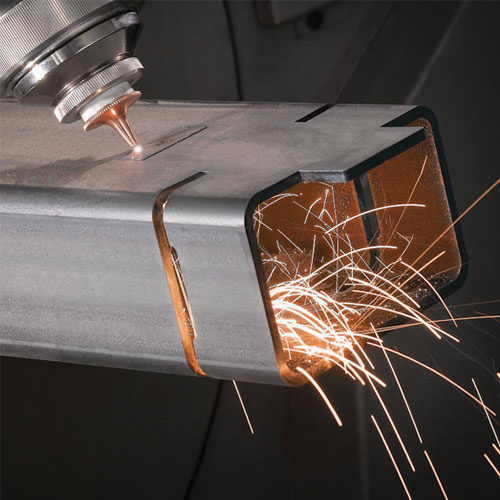
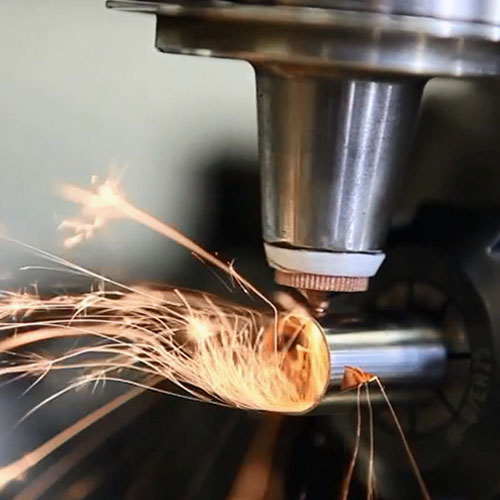
Laser cutting of tubes and profiles are performed by combined rotation and longitudinal movement of the workpiece - relative to the laser cutting head. Burr-free and smooth cutting edges are only achieved in laser cutting if the desired distance between nozzle and workpiece is maintained with high precision at each tube position. If the laser cutting head is additionally pivoted by means of tilting axes, not only straight cutting edges but also bevel cuttings can be produced. This enables particularly complex contours and smart plug connections of several workpieces made of steel, stainless steel, or light and non-ferrous metals. Wall thicknesses can be up to 15 mm, while the tube or profile length is only limited by the size of the laser system.
Precitec offers the right laser head for all applications in tube and profile laser cutting. Depending on the complexity of the contours, both 2D and 2.5D laser cutting heads can be utilized. Highly automated laser cutting systems benefit from cutting heads with motorized focus position adjustment and sensor-supported monitoring and control functions. The laser cutting head influences the capability, productivity, and reliability of your tube and profile cutting system and therefore provides the desired quality and results expected.
Robot Cutting
- Complex 3D laser cutting – made easy
Flexible and highly productive robot cutting (3D)
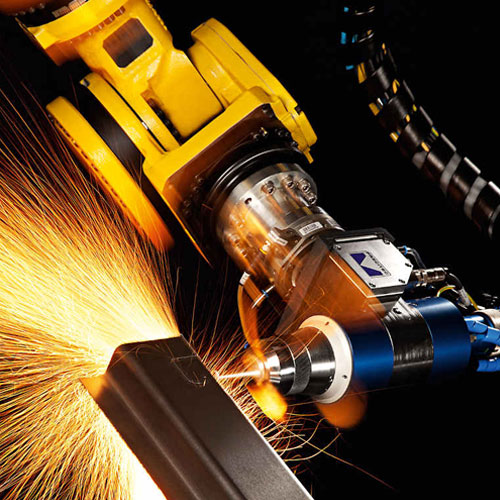
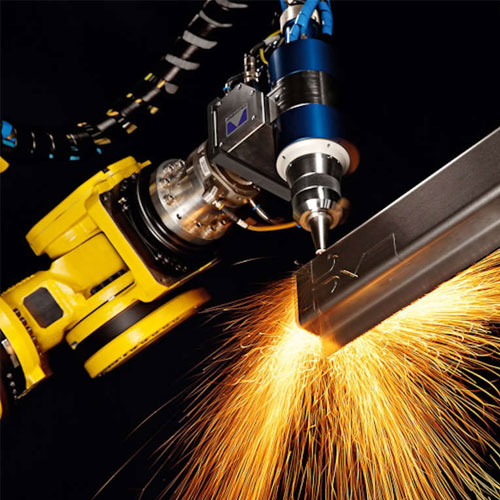
Laser cutting of complex workpiece geometries is performed either on 5-axis systems or robots. Thanks to their particularly simple beam guidance fiber-guided lasers are generally used, especially for agile robot applications. The insufficient path accuracy of robots as well as part and positioning tolerances often require additional axis systems. A Z-axis directly integrated in the laser cutting head controls the distance to the workpiece with high precision.
The laser cutting systems are often part of complex production lines working under difficult environmental conditions. Operators therefore place high demands on the interference resistance and ease of maintenance of the laser cutting optics.
Micromachining
- High-precision laser cutting in micromachining
Material processing for highest quality requirements
In medical and precision engineering applications, accuracies with cutting widths far below 20 µm are sometimes required. The laser is an ideal tool for these applications, as it offers the possibility of producing highly detailed components with the highest quality cut edges. The minimal heat input results in low thermal and mechanical stress on the sensitive parts. Laser cuts can be produced with great precision and flexibility in 2D or 3D laser cutting systems, even with variable cutting angles.
Typical applications include the laser cutting of ultra-fine structures such as stents for the medical industry or of the smallest micromechanical components made of high-quality stainless steel, non-ferrous metals, and ceramics for the watchmaking and precision engineering industries. For this purpose, mechanically and thermally stable machine concepts with precision axes are used. Small spot diameters require a good optical design with the finest adjustment possibilities and corresponding optical positioning aids with integrated camera technology. Precitec laser cutting optics are suitable for continuous shift operation with solid-state lasers as well as for various frequency-multiplied laser wavelengths in the ultra-short pulse range.
Industry Solutions

Automated laser cutting
Irreplaceable in modern industry
Precitec offers innovative cutting solutions for automated processes. Semi-finished products, and finished parts of various sizes, made of different metals, are manufactured in many different branches of industry such as mechanical engineering or automotive engineering. Our cutting optics are characterized by excellent performance stability. Smart process monitoring also enables a significant increase in productivity and reproducible high quality in the end product.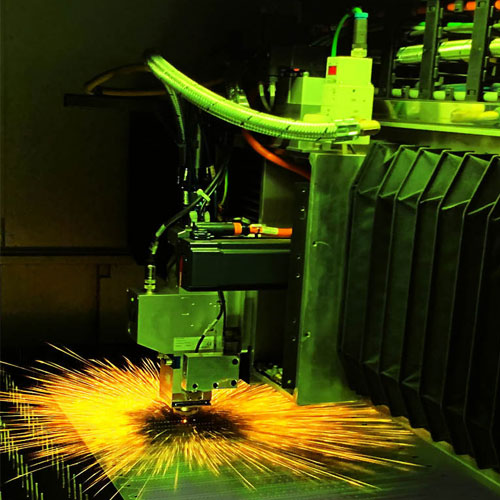
JobShop
- Contract manufacturing in laser material processing
Sheet metal production as a service
The production of components that can be installed in metal and vehicle construction as well as in plant and apparatus engineering is mainly carried out on laser cutting machines at specialized service companies. JobShops offer the spectrum from technological development to complete production. Thanks to their high level of technical expertise combined with comprehensive customer consulting, short response times for order enquiries and rapid implementation are guaranteed.
We offer the greatest possible flexibility with our laser cutting heads and services for the realization of customer-specific and complex cutting contours. These contours are produced by means of laser beam fusion cutting. It is a contact-free cutting process with minimal damage to the cut edge. This speaks for its excellent suitability for subsequent processes such as bending, welding and coating.
Our products lead you to success:- Minimized machine downtime through permanent monitoring of the plant status. Positive side effect: maintenance only when it is actually necessary.
- Stable processes, almost burr and spatter free, even with varying sheet quality
- In-depth process understanding for the production of metals, non-ferrous metals, and mixed alloys
- Worldwide service presence on site, performed by highly qualified technicians
Automotive
- Laser cutting in the automotive industry
Varied, flexible, and customized
In the era of individualization, the management of variants in automotive engineering is more important than ever. Variants are required since every manufacturer wants to produce a wide diversity of model versions with little effort. However, in order to be able to map the production of variants economically, they are integrated into the production process as late as possible.
Laser cutting of battery foils
In battery production, coated foils of different materials and thicknesses are separated and later assembled into complete prismatic cells. For the processing of these thin layers, which are mostly made of copper or aluminium, the laser can show its strengths to the full. Mechanical separation processes often lead to damage to the surface coating - with the laser, the workpiece is processed without contact in the coil-to-coil process. By using process gases, possible particles are discharged downwards, so that the material surface is not contaminated. A dynamic and precise distance control ensures a high quality of the cutting edges and low burr heights.
MiniCutter - Small all-rounder for thin sheet thicknesses
When speaking about e-mobility, we offer even more: Our laser welding solutions enable durable welded joints through intelligent quality monitoring.

Precision Technology
- Laser cutting in precision technology
Precision contours in highest quality
Pulsed fiber and solid-state lasers are used for the production of ultra-fine mechanical components.
The fine processing with laser is flexible – also ideal for single part production. The interaction of the laser on the metal workpiece is very short and therefore heat doesn´t distort the component. The results are precision blanks or contours of the highest quality with slit widths and web widths of up to 10 µm.
Examples of applications are screens for the food industry, contacts in the electrical industry and thin sheets for the automotive industry or medical technology.
Laser Welding

Automated total solutions for your laser welding process
Industry proven and reliable
Precitec offers high-tech welding optics and intelligent monitoring systems for your laser welding processes. Our systems have proven themselves worldwide in various branches of industry and work in 24/7 serial operation.
The modular laser welding optics allow flexible configuration options and easy integration into your system. From "low-power" to "high-power" laser applications, you will always achieve a high degree of economic efficiency with our welding optics.
The process monitoring system records measurement data during laser welding - these are used for 100% quality control. Production errors are detected immediately and can be corrected in time. The data storage in combination with the component ID enables consistent traceability.
Innovative beam shaping, completely direction-independent process control and the efficient use of additional material are possible concepts for high productivity and clean process conditions.Processing Heads
Modularity for your machine concept
Industry proven and reliable
No matter whether you need a simple or very complex design of the welding optics – we adapt to your machine design and your requirements. The modular construction kit allows flexible configuration options and easy integration into your system. From "low-power" to "high-power" laser applications, you will always achieve a high degree of economic efficiency with our welding optics.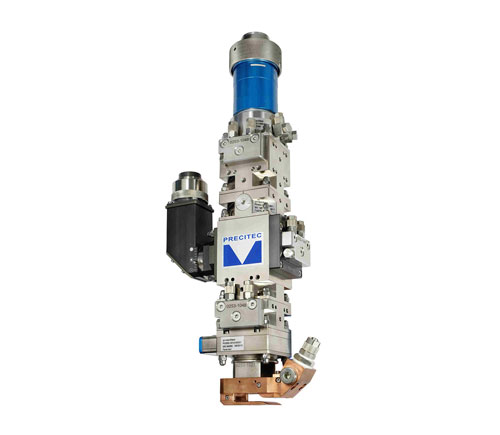
Modular laser welding optics YW30 / YW52
- Technical data
- max. laser power: 6 kW (YW30), 20 kW (YW52)
- Dimensions (standard module): 50 x 50 mm (YW30 edge dimensions) 74 x 74 mm (YW52 edge dimensions) Focal lengths
- Collimation YW30: 55 mm (NA ≤ 0.22), 75 mm (NA ≤ 0.17), 100 mm (NA ≤ 0.14), 125 mm (NA ≤ 0.11)
- Focal lengths collimation YW52: 80 mm (NA ≤ 0.25), 100 mm (NA ≤ 0.25), 125 mm (NA ≤ 0.18), 150 mm (NA ≤ 0.15), 185 mm (NA ≤ 0.13), 200 mm (NA ≤ 0.12)
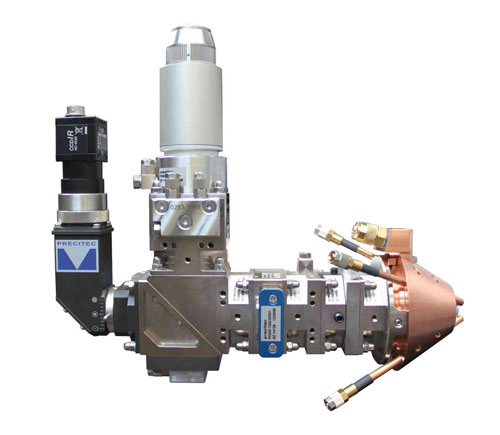
Laser deposition welding with metal powder - focusing optics YC30 | YC52
- Technical data
- max. laser power: 2 kW (YC30), 6 kW (YC52, depending on application and nozzle used)
- Working distance: 12 to 14 mm (YC52 - 24 mm at 250 mm focusing focal length)
- max: 0.19 for FC75, max: 0.08 for FC150
- min. powder focus diameter (YC30): 2.0 mm
- min. Powder focus diameter (YC52): 0.7 mm (annular gap nozzle), 2.0 mm (4-jet nozzle)
Additive manufacturing for repair, surface finishing, and 3D printing
In the field of laser cladding, our welding optics with powder nozzle allow you a wide range of applications. Almost pore-free layers with a long service life can be produced completely independent of direction. Typical areas of application are the generation of corrosion and wear protection layers, repairs, and the generation of 3D structures.
The YC30 and YC52 processing heads developed for additive manufacturing offer the same flexibility for your machine concept as the modular processing optics YW30/YW52.
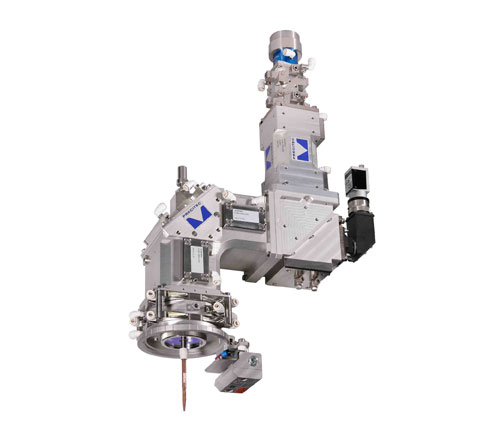
CoaxPrinter
- Technical data
- max. laser power: 6 kW (cw, 900 - 1080 nm)
- Focal lengths Collimation: 55 mm (NA ≤0,22), 100 mm (NA ≤0,13)
- Stick-Out: ≈ 10 mm
- Welding rod diameter: 1.0 - 1.6 mm
Laser deposition welding with coaxial wire feed
The CoaxPrinter offers you a wide range of applications in additive manufacturing - from filigree structures to complex large-volume 3D shapes. It is used for 3D printing, prototype construction and wear protection. Non-porous layers can be applied in any direction.
Process Monitoring
Automated total solution for your laser welding
Process monitoring for series production
Precitec monitoring systems help in many areas of industrial production in 24/7 operation. The measured data recorded during the welding process are used for 100% quality control. Production errors are detected immediately and can be corrected in time. The data storage in combination with the component ID enables consistent traceability.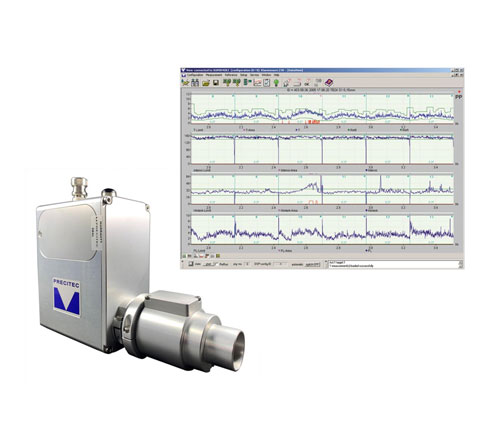
Laser Welding Monitor LWM
- Technical data
- Application area solid-state lasers: IR/blue/green and CW/pulsed
- Integration for fixed optics, scanner and laser-internal
- Flexible interfaces: TCP/IP, fieldbus, digital I/O
- Application examples: e-mobility, battery, body-in-white, seats, gears, airbags, consumer electronics, micro welding
Monitoring your laser welding processes in real time
The Laser Welding Monitor LWM 4.0 is used for the online process monitoring in many areas of industrial production in 24/7 operation. In series production, it detects and documents a wealth of quality and productivity relevant information to the laser welding seam. Thus, quality fluctuations caused by component tolerances, contamination, or different material batches can be monitored and detected.
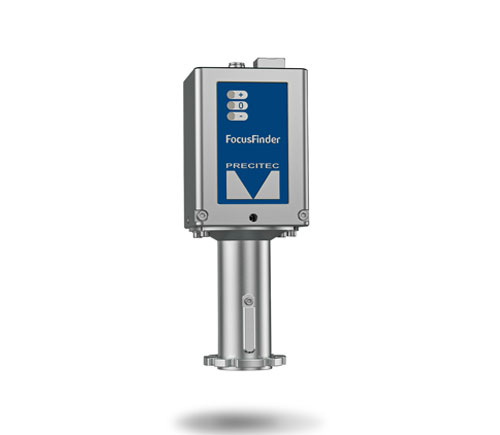
FocusFinder
- Technical data
- Measurements/second: up to 60 Hz
- Axial measuring range: 10 mm (depends on focussing optics of welding machine)
- Accuracy: ± 50 µm
- Spot Diameter: 400 µm (depends on focusing optics of welding machine)
Exact focus control for high-quality welding results
Optimum focusing of the laser on the workpiece is crucial for high-quality laser welding results. Detuning the workpiece from its ideal axial position – whether through workpiece tolerances, non-ideal clamping devices, or other positioning inaccuracies – impacts welding quality. To prevent such focus-related welding failures, FocusFinder monitors the axial position of the workpiece and ensures exact focus control and positioning through the collinearity of the probe and laser beams.
Precitec IDM
- Technical data
- Positioning accuracy of less than 50 μm
- Measuring range: approx. 10 mm
- Sampling rate: 70 kHz
- Interfaces: Network, RS-422, 2x analog (0-10V)
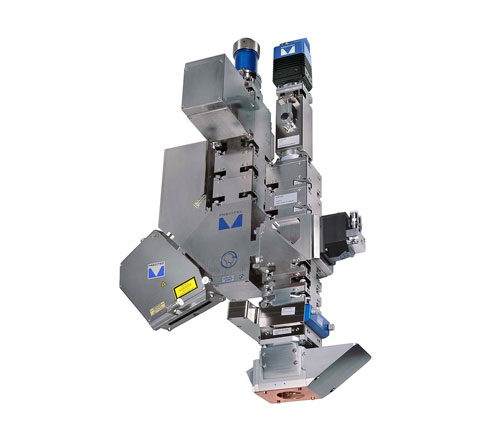
WeldMaster 4.0 Scan&Track and Inspect
- Technical data
- Real-time image and data processing
- Support of all common fieldbus interfaces
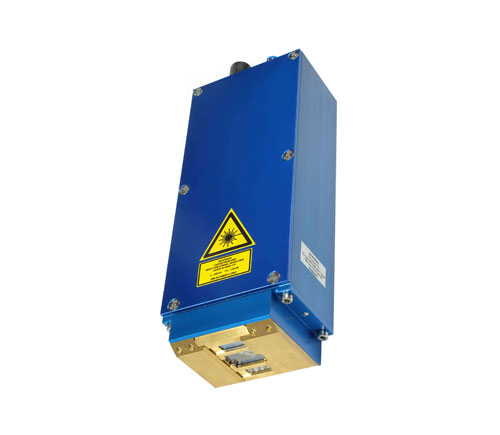
WeldMaster 4.0 Inspect
- Technical data
- Self-sufficient system for offline quality monitoring
- Highly accurate detection of surface defects and reliable evaluation 100% documentation
- Standard interfaces to Precitec welding heads
- Standard interfaces for remote inspection cells
Highly accurate detection of surface defects and reliable evaluation
The WeldMaster 4.0 Inspect can work independently of the actual welding station. It is a self-sufficient quality control system that detects surface defects with high precision and evaluates them reliably. Components with smallest gaps, holes, cracks and other surface defects are rejected from the running production. This ensures a smooth production process. The system also recognizes high-resolution seam profiles in 3D form, compares them with a predefined threshold values and classifies them as good or bad parts.
WeldMaster 4.0 Scan&Track
- Technical data
- max. frame rate: 2400 frames/sec
- max. image resolution: 1024 x 1024
- Vertical measurement resolution: ≥20 µm
- Lateral resolution: ≥10 µm
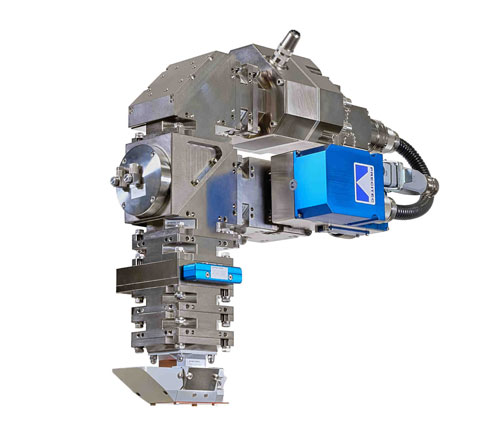
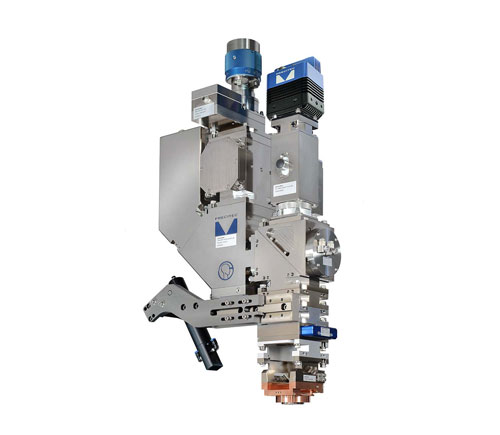
Automated welding process with intelligent beam guidance and beam forming The WeldMaster 4.0 Scan&Track combines tracking with intelligent beam guidance for your automated welding process. The tracking system measures important geometric variables in the immediate vicinity of the welding position, from which the component position as well as the joining position and gap are calculated. The measured values are processed by the system control and control beam guidance and forming using galvanometer scanners. Even for components with tolerances, you get stable welding processes and consistent quality at all times and for almost all seam shapes.
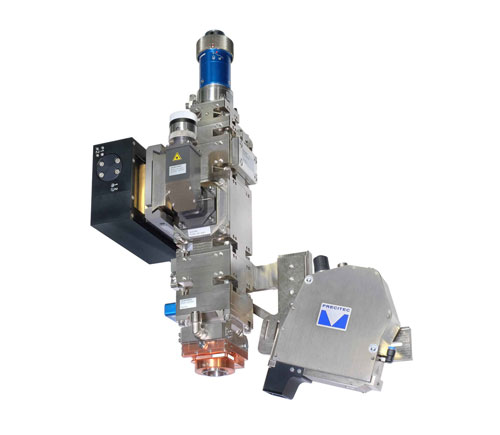
WeldMaster 4.0 Track
- Technical data
- Fieldbus and analog interfaces for controlling 2 axes
- Standard interfaces to Precitec welding heads and axes
- Customer-specific interfaces to external axes
- Processing of encoder signals
High-precision measurement of the component position and positioning of the welding unit
The WeldMaster 4.0 Track measures the component position in the immediate vicinity of the welding position contactlessly, quickly, and with high precision. The joining position and gap are detected and used for high precision control of the welding unit. The intelligent and automated seam tracking detects different joining geometries such as a butt joint, zero gap, fillet weld in lap joint and T-joint.
Scanner welding
- Remote welding or scanner welding stands for highly dynamic and economical laser welding. This involves working with large focal lengths that give a great operating range. The laser beam is directed onto fast-moving deflection mirrors and then onto the workpiece. There is no need to move the processing unit or the workpiece. This results in a processing field in which welding is performed quickly with high precision. Non-productive times are almost completely eliminated by the highly dynamic movements, and reproducibility is increased.
Precitec offers various laser remote systems: from 1D solutions to extensive 2.5D scanner processing systems. The ScanWelder enables targeted use of laser power in width and depth. This results in optimized weld seams, especially in aluminum welding. Electrical conductivity and tightness are important criteria in e-mobility. Here, the ScanMaster represents a total solution consisting of distance measurement, component position detection and process monitoring for use in highly dynamic battery series production. 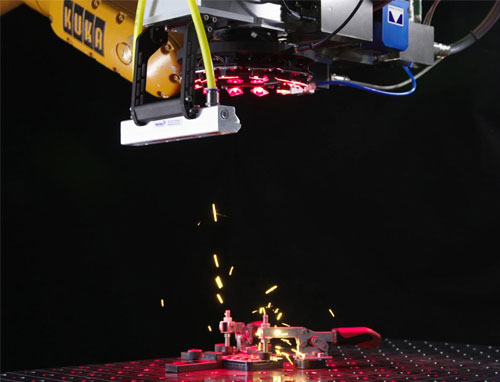
ScanMaster
- Technical data
- Compatibility: all IR fiber lasers
- max. laser power: 6 kW
- High-precision component measurement:
- Dimensions: 600 x 220 x 500 mm
- Weight: approx. 25 kg
Efficient and highly productive scanner welding
Today, scanner welding enables highly accurate and economical remote processing in series production. With the help of mirrors, the laser beam is positioned within a processing field without having to move the focusing optics or the workpiece. This makes machining highly dynamic, economical and thus efficient.
Scanner optics for remote processing not only enable precise positioning and stable processes
The ScanMaster offers an attractive solution for scanner welding. It combines high-precision distance measurement to the workpiece, auto-focus, component position detection with high-resolution image processing and process monitoring. The ScanMaster has a modular design for this purpose - all performance features can be customised to individual requirements.
Strength, electrical conductivity and tightness are important criteria in the field of e-mobility. Precise, accurate and reproducible production is the focus when contacting power electronics or battery cells.
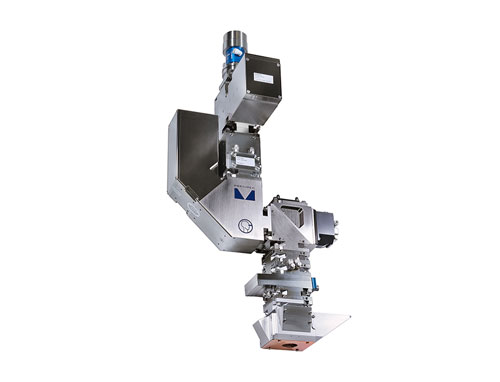
ScanWelder
- Technical data
- Beam oscillation: max 500Hz
- Adjustable weld seam width (depending on the optical design)
- Simultaneous laser power control (analog output 0-10V)
- Wavelengths: 905-1080nm
- max. laser power: 16kW
Applications

Versatile use of laser welding
High efficiency and flexibility
The laser tool can be used to generate various seam shapes. Depending on the requirements, small fine weld spots, such as in micro welding or in the contacting of batteries, but also deep-welded long seams are possible. Uniformly shaped seam geometries and the low distortion of the components are advantages of this technology. Laser applications in the following application spectra can thus be described.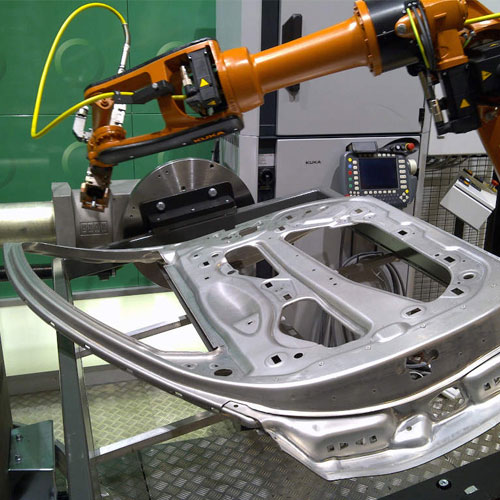
Lightweight Construction
- Laser remote welding of lightweight construction materials
Highly dynamic and flexible without additional wire
In the context of climate protection, the reduction of CO2 emissions is one of the predominant topics of our time. Therefore, the use of aluminum allows vehicle manufacturers to reduce weight and thus achieve direct fuel savings without compromising performance. Typical areas of application are add-on parts such as car doors or tailgates, which have a high number of joints.
Until now, welding with filler wire has made aluminum joints possible. However, it is accompanied by increased expenditure of material, disposition, and energy. In addition, all laser welds usually had to be checked in another workstation with a monitoring system.
The WeldMaster Scan&Track&Inspect welding system with its innovative laser power adjustment makes it possible to weld aluminum alloys without filler wire and offers you an automated overall solution on one system.
The seam tracking is optical, the welding takes place from a safe distance ("remote"), and the seam control is performed online during the laser welding process. All functions directly occur in one pass, with the welding head passing over the joint. This means cost and time savings for your process. If irregularities occur at the joint, the system intervenes and adapts the welding parameters, or sends a warning or error signal directly to the system. This makes your series production more stable, efficient, and economical.
Powertrain
- Laser welding in gear production
Automation increases your process quality
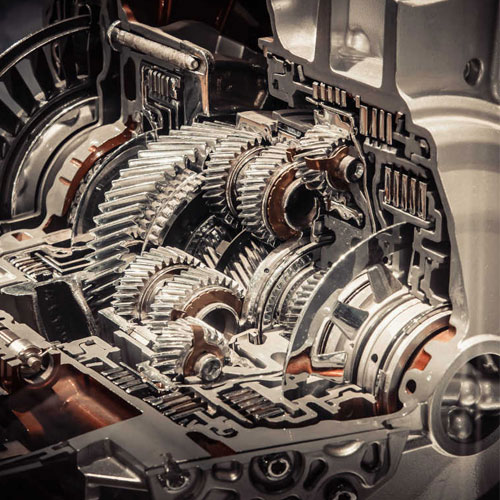
Modern transmissions have 8 to 10 gear teeth. And as modern design has improved, components have decreased size. Therefore, the installation space required for this in the car has decreased as well. The development of gear production to today's size and performance is in many ways due to the laser welding.
Here the laser represents an "enabling technology". Hardly any other joining method can join components in such a small space with such precision and high strength. In order to be able to exploit the strengths of the laser, it is important to hit the joining point exactly. An offset of only 0.1 mm can lead to failure of the component.
The WeldMaster 4.0 Track is able to find the joining position contact-free, which allows it to position the laser beam with the necessary precision. All data is recorded and position errors are immediately transmitted to the system. The use of the system increases the output of your welding system on "IO-parts" and documents the produced quality.
The use of Precitec IDM is also industry proven. The system complementarily measures the welding depth of each welded part throughout the entire weld. The 100% inspection significantly increases production reliability and allows faulty welds to be detected early on.
The measured values are analyzed and saved in the WeldMaster 4.0 Track System together with the positioning data. The measuring principle is online and non-destructive, which increases the output of the system and noticeably reduces the number of test parts.
Deposition Welding
- Reinforcement by laser deposition welding
Local functional layers for longer life
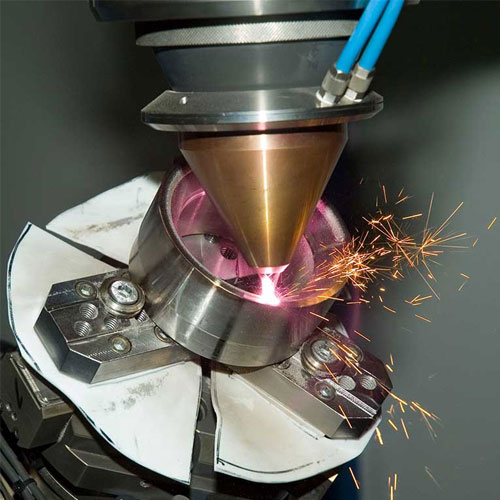
Laser deposition welding is a coating process that is used in modern production and maintenance. In aerospace, shipbuilding, power generation, and tool and die industries buildup, welding is used to optimize or repair the highly stressed surface of a component.
By applying a function-optimized layer, the component is reinforced exactly where the highest stress is expected. In this way, service life can be extended and costs saved. Furthermore, depending on the alloy of the layer material, such properties as corrosion resistance and strength can be improved.
The repair of high-quality components or expensive tools is another important area of deposition welding. In this process, the surface of the material is heated locally with the laser and at the same time material is added. The component geometry and its properties are restored and the component can once again perform its full function.
The processing heads YC30/YC52 combine efficiency and flexibility in laser deposition welding with powder and enable you to cover a wide range of applications. Almost pore-free layers with a long service life can be produced completely independent of direction. The Precitec IDM is able to measure the height of the applied layer during the laser weld deposition.
Precitec offers the CoaxPrinter for laser deposition welding with wire. The innovative beam shaping enables a true coaxial wire feed into the process. This enables a completely direction-independent process control even with different materials. Additive processes with wire offer easy handling and better effieciency as the wire is used completely utilized. The results are often accompanied by high productivity and clean post-process surface conditions.
Micro Joints
- Precision and quality in microwelding of electronic components
Increased requirements for process monitoring
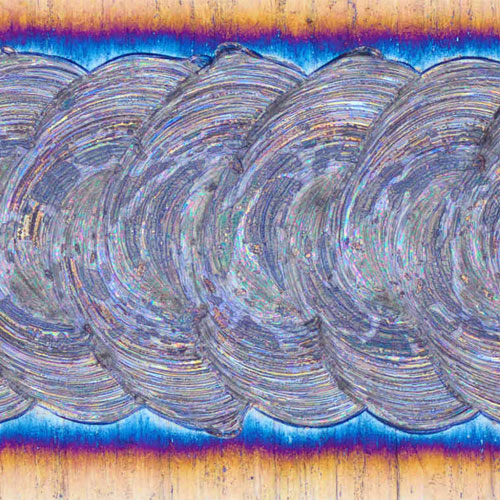
With the development of ever more powerful lasers, the range of applications for microwelding has also increased in recent years. Its significance has increased especially in the electronics sector. The extended requirements for electronic components such as miniaturization, high precision, aesthetics, and above all, quality are very much in line with the microwelding process.
In microwelding, high-frequency laser pulses are used to introduce only a small amount of energy into the component. This also means a minimum heat load. The combination of increasing peak powers, higher energy densities and more precise control of the lasers makes laser welding of exotic mixed joints possible today.
For the topics of precision and quality, Precitec provides exactly the right tools for efficient production. With the proven LWM, it is possible to monitor the laser welding of a wide variety of materials online and thus ensure the quality of the weld. It recognizes and documents a wealth of quality and productivity relevant information on the laser welding seam. Rejects can thus be minimized. With the FocusFinder, you achieve high quality welding results by focusing the laser very precisely on the workpiece, thus reducing rework and scrap.
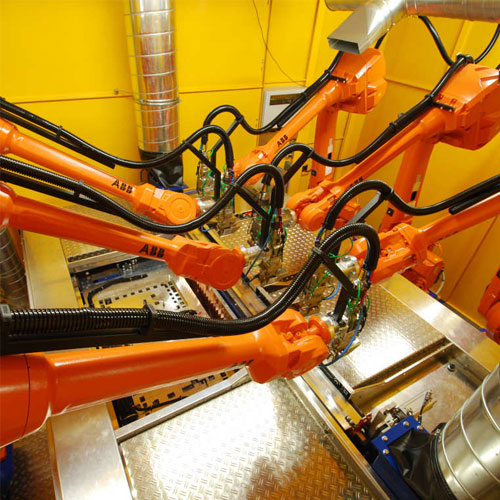
Seat Production
- Process monitoring and safety in seat production
Manufacturing process with quality verification
The vehicle seat is the mechanical interface between the vehicle and the occupant. Consequently, it plays a fundamental role in the safety of the vehicle occupants. An automated and reliable manufacturing process with quality verification is therefore essential for the production of seat components.
Important elements in this production chain are laser welding processes. These are carefully developed, evaluated, and implemented. Differences in the laser process often mean errors in the component and are therefore a source of risk.
The LWM is used for online process monitoring in industrial series production. It recognizes and documents a wealth of quality and productivity relevant information on the laser weld seam. The measurement results of each individual seat component can be traced and documented even years later.
The Precitec IDM system can additionally measure the welding depth during the deep welding process during the welding. The real welding depth has a decisive influence on the load capacity of the seam and therefore is absolutely relevant for safety.
The regulated welding depth goes one step further. The user does not specify a laser power as usual, but a target value for the welding depth. The IDM system then regulates the laser power and stabilizes the specified value of the welding depth.
The ScanMaster enables remote processing of seat components. The scanner optics are modular - various performance features such as high-precision distance measurement to the workpiece, component position detection or online process monitoring can be tailored to individual requirements.

Airbag
- The airbag as a safety-relevant component
Automation increases your process quality
The airbag is probably the component on the vehicle that stands for occupant safety like nothing else. It´s essential for overall safety if you think about live detonators being installed in a vehicle. When the airbag module does not function as desired, its protective effect is completely absent and it can lead to serious injuries to the occupants.
In the airbag, explosives are laser-welded in a steel casing. Irregularities in the laser welding process are clear indicators of defective welds. Safety-relevant structural components must be monitored and documented. The LWM-System is the optimal tool for this. All welding processes are monitored, evaluated, documented, and stored. Thus 100 % traceability and transparency of your laser welding processes is possible – even after many years.

3D Printing
- 3D Printing with metal
Design of filigree forms and complex structures
With the buzzword "3D printing," the industry has found a method for additive manufacturing that advertises with the main statement "complexity for free." 3D printing with metal has many advantages. Detailed forms, complex structures and geometries can be easily implemented. At the same time, it opens up the possibility of a tool-free manufacturing process.
The different printing processes using metallic materials as an additive material are divided into Powder Bed Fusion, Direct Energy Deposition, Material Extrusion, Binder Jetting, and Material Jetting. In all these processes, complex three-dimensional components are created by the layered structure.
In the field of Direct Energy Deposition (DED) - also known as laser cladding - a distinction is also made as to the form in which the additive material is fed into the process. The terms DED-Powder (DED-P) for powder and DED-Wire (DED-W) for wire exist as additive material.
An application for the DED is the functional extension of existing basic bodies or tools. Individual design, flexibility, and cost efficiency are essential benefits of additive manufacturing processes.
The processing heads YC30/YC52 combine efficiency and flexibility in laser deposition welding with powder and enable you to cover a wide range of applications. Almost pore-free layers with a long service life can be produced completely independent of direction. The Precitec IDM is able to measure the height of the applied layer during the laser welding process.
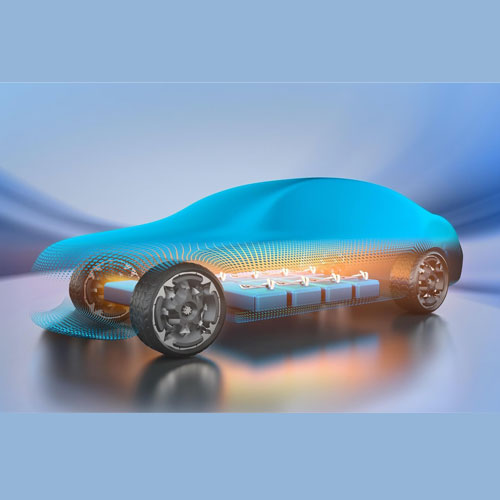
E-Mobility
- Attractive laser welding solutions for e-mobility
Durable welded joints through intelligent quality monitoring Laser goes e-mobile: with the sharp rise in global demand for electric motors, battery cells, and power electronics in the automotive industry, the need for innovative and efficient laser welding solutions is increasing. Precitec offers a wide range of turnkey solutions.
Industry Solutions
Highest efficiency and versatile use
Durable welded joints through clever heads
Precitec offers a wide range of turnkey laser welding solutions for the automotive and automotive supply industry, electronics, prototyping, and aerospace. The monitoring of the laser welding process allows faulty welds to be detected at an early stage, leads to reproducible and high-quality welded joints, and significantly increases production reliability.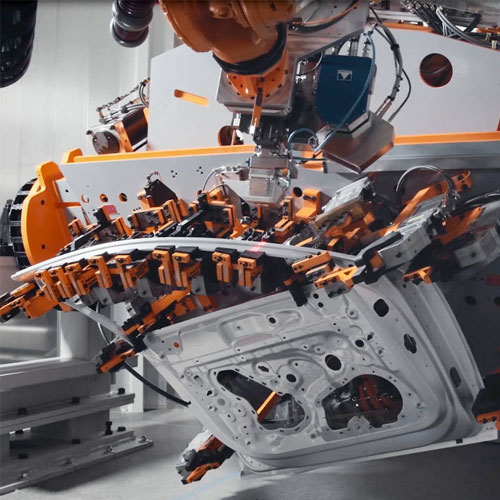
Automotive
- Laser welding in the automotive industry
Highest efficiency and versatile application
The topic of laser welding in the automotive industry is more interesting now than ever before. The benefits of the laser seen in non-contact and force-free processing from only one side are taking on a whole new meaning again with the topic of e-mobility.
The extremely high energy density combined with maximum precision makes the laser a highly economical production tool. Without it, the topics of our time such as battery contacting, laser welding of hairpin pairs, or even classic applications such as the welding of attachments would be unthinkable.
It is not only the speed of the weld itself that makes the laser successful. Profitability, for example in remote welding of aluminum, is largely determined by process monitoring and seam bead control, which is carried out directly during the welding process.
A component is only successfully welded when the quality of the laser welding has been tested and documented. These are our strengths and this makes us a value added partner in the automotive industry.

Consumer Electronics
- Laser material processing in the consumer electronics sector
Advanced and efficient production of smartphones, tablets, etc.
With focus on full automation and quality-monitored laser processing for laser welding applications, Precitec is your trusted partner in the field of consumer electronics. The key to success is defining your specific application needs and implementing the perfect process monitoring systems within the specified equipment, control systems, and laser technology of your production plant.
Electronic devices like laptops, tablets, game consoles or smartphones are constantly changing. A high degree of flexibility in the production of consumer electronics and short run-up times play a critical role here. In addition, the extremely short life cycles of end products are reflected in the demands on the perfect system partner for quality monitoring systems in laser welding and cutting.- Flexible functionality and easy adaption of the systems for inline control into the electronics assembly
- Extremely short and reliable set-up processes
- Securing of worldwide on-site support and production assistance - short development times for customer-specific adjustments
- Perfect process understanding from pulsed to CW, steel welding, aluminum welding, copper welding, and mixed joints
- Professional consulting expertise and partnership
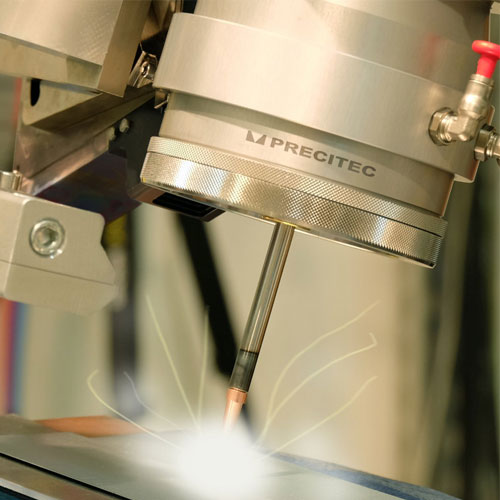
Prototype Welding
- Additive manufacturing in prototypes
Reduction of development time and development expenses
New customer needs can expeditously be met by innovations. The aim is to launch a product with new, improved properties on the market, preferably before the competitor. Through additive manufacturing, it is possible to accelerate the development process and to respond very flexibly to the individual wishes of the customer during this time.
"Rapid prototyping" describes a technology in additive manufacturing. In this process, models and prototypes are produced that don't yet have the final properties of the product. The produced components only provide individual and for the application specific properties of the later product. In this way, small series can be produced in an economically viable manner.
Even with the help of additive manufacturing, complex components can be manufactured in a single production step. This simplification of production can save resources.
Especially interesting is the rapid prototyping for the automotive industry, as well as for aerospace and tool making. The reduction in "time-to-market" reduces development costs while maintaining the same amount of work and directly contributes to a reduction in overall costs.
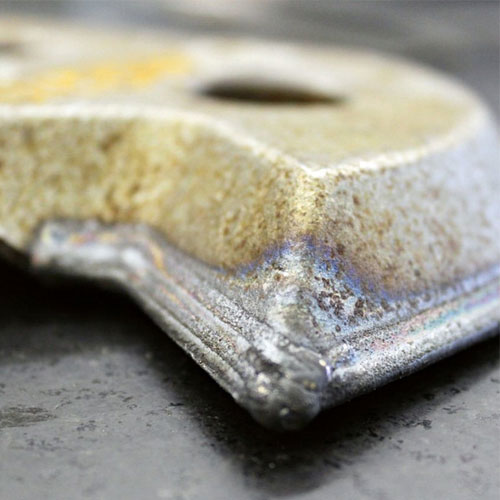
Wear Protection
- Repair and wear protection through additive manufacturing
Increasing the service life of components and saving on new parts
Components and tools wear out in the application exactly where the contact is the highest. Among other things, material removal at these points leads to failure. Laser deposition welding is an efficient method for repairing high-quality components or tools and providing them with a function-optimized layer.
During the process, the laser is used to heat the surface of the material locally and at the same time material is added in the form of powder or wire. Typically, this is used to restore the component geometry. Highly stressed areas can also be locally reinforced with hard and wear-resistant functional layers. This extends the service life of the components and saves considerable costs, as repairs can be limited to the damaged or worn areas only.
As well as forming tools, the most well-known repair parts include shafts, bearings, engine parts, and turbine parts such as blades. The filler materials used have identical material properties or consist of highly corrosion and wear-resistant alloys.
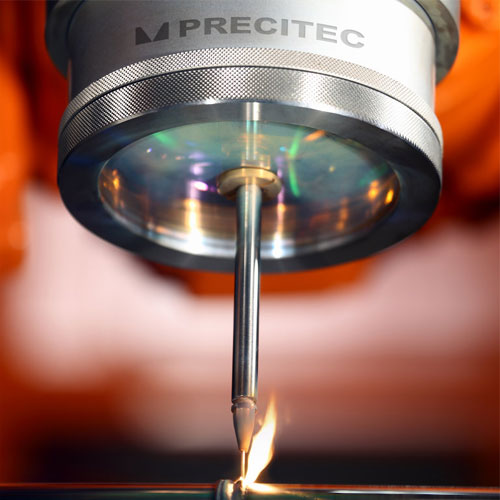
Aerospace Technology
- Additive manufacturing in aerospace
Increase of flexibility and efficiency and cost savings
The aerospace industry is one of the leading industries in the use of additive manufacturing. Lightweight construction is one of the key factors here and additive manufacturing offers a completely new approach to design and production. This particularly applies to processes such as the repair and reworking of selected components. These can be produced in almost any geometry by additive manufacturing. Especially with bionic structures, conventional manufacturing processes reach their limits here. This is demonstrated above all by innovative developments in DED processes with powder and wire, where semi-finished products or intermediate structures are given complex properties. The results are close to final contour geometries that can be produced at low cost.
From the perspective of companies in the MRO (Maintenance, Repair and Overhaul) sector, additive manufacturing brings enormous advantages. Components can be produced "on demand". This reduces or even completely eliminates costly warehousing. In addition, maintenance companies can be equipped with appropriate production facilities to produce urgently needed spare parts. This reduces transport distances and delivery times enormously.
A special feature of additive manufacturing, compared to conventional manufacturing processes, is that the component costs are independent of the number of units. Therefore, especially the production of small series is economical.
In short: independence from batch size, "complexity for free," and individualization are essential features of additive manufacturing.
