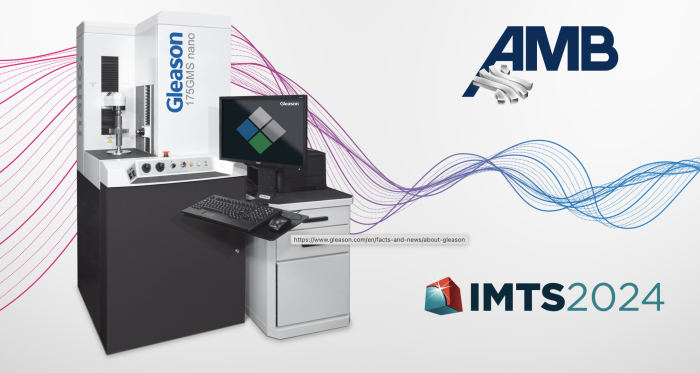
Gleason: Nano-Level Gear Inspection Goes Smaller

The 175GMS nano Gear Metrology System delivers ‘nano’ sub-micron level inspection capabilities to smaller gears, helping ensure minimal noise, greater precision, and longer life.
Building on the success of the 300GMS nano platform, Gleason introduces the 175GMS nano Gear Metrology System, extending the capabilities of its popular 175GMS model. Designed for comprehensive gear inspection, the 175GMS nano accommodates gears up to 175 mm in diameter and shaft-type gears up to 480 mm in length, with a maximum measurable tooth width of 340 mm and a module range of 0.4 (optionally 0.15) to 6.35 mm. This update significantly expands the measuring range of the 175GMS nano, while also incorporating the nano capabilities introduced with the 300GMS nano.
The integrated probe changer automatically deploys a skidless probe to assess the surface quality of gear teeth with sub-micrometer precision, examining both profile and lead. Optionally, the skidless probe can feature automatic angle adjustment to accommodate varying helix angles of gears. Equipped with a high-precision SP25 3D scanning probe head, a diverse array of styli, and advanced mathematical analysis capabilities, the 175GMS nano Gear Metrology System supports roughness evaluations according to DIN, ISO, ANSI, and other standards. Additionally, the latest GAMA™ software platform facilitates gear noise analysis through the Advanced Waviness Analysis tool and provides 3D measurement and GD&T analysis capabilities comparable to those of a CMM.
Like all the metrology systems in the Gleason GMS® series, the 175GMS nano seamlessly integrates into any user’s manufacturing ecosystem through use of Gleason’s latest GAMATM 3.2 software suite with its user-friendly interface supporting many different languages. Fully compatible with Windows, it effortlessly integrates into server environments, opening avenues for enhanced SPC data evaluation and remote maintenance services via Gleason Connect®, among others.
Through Gleason’s “Closed Loop” feature, users can take the connectivity of manufacturing and inspection to the next level. The 175GMS nano communicates inspection results directly to Gleason production machines, enabling automatic correction of machine settings. From Power Skiving to threaded wheel gear grinding, this synergy opens new horizons for quality production. Additionally, inspection results like topography measurements and order spectrum from Advanced Waviness Analysis software can be forwarded to KISSsoft® Design Software. In KISSsoft, the designer can see differences between the original design and the actual produced gear and evaluate variables such as the contact pattern in the final application under various load conditions. Noise behavior can then be predicted even before testing on a single flank tester or end of a line tester at final installation. This “Smart Loop” technology advantage holds the key to elevating gear designs faster and more seamlessly to a much higher level, for peak performance.
The 175GMS nano is optionally equipped with the patented Advanced Operator Pendant (AOP) enabling operators to record video and voice messages and to monitor environmental conditions. It may also be used to support remote maintenance via video telephony and can read bar and QR code information directly into the machine, for further use in inspection protocols or to select the appropriate inspection cycle.
As gear industries advance, so does the need for unparalleled precision. The 175GMS nano Gear Metrology System heralds the advent of a new era, where nano-level inspection is no longer the exception, but the rule. The 175GMS nano can be experienced live at IMTS and AMB shows in September 2024.
For more information, please visit: https://www.gleason.com/en/facts-and-news/news-room
News Categories
- » NEWS HOME
- » Automation & Robotics
- » Industry 4.0
- » Material Handling
- » Sensors
- » Quality & Testing
- » Machine Vision
- » Laser & Optics
- » Metalworking
- » Motion Control & Drives
- » Hydraulics & Pneumatics
- » Process Industry
- » Renewable Energy
- » Agriculture
- » Home & Office Furniture
- » Environmental Tech


